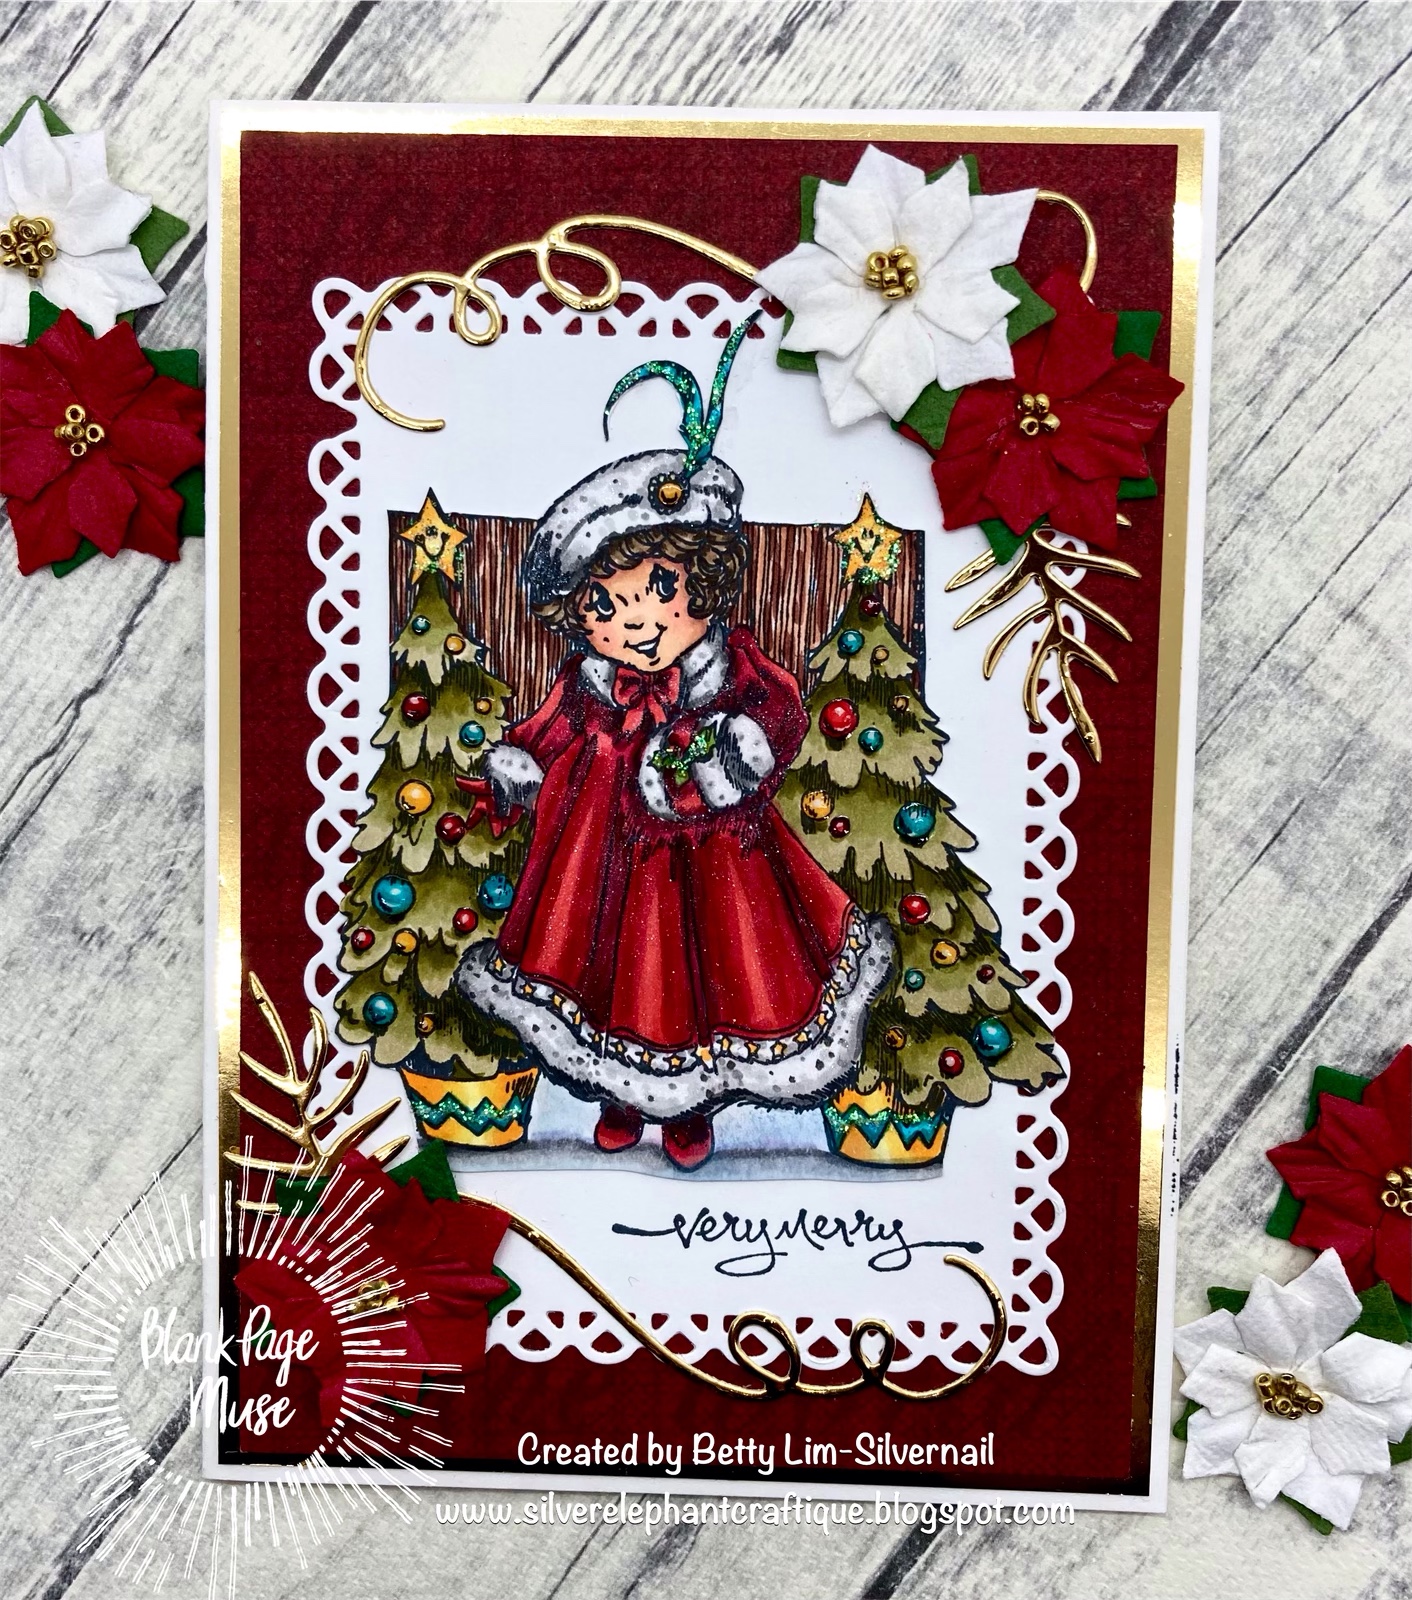
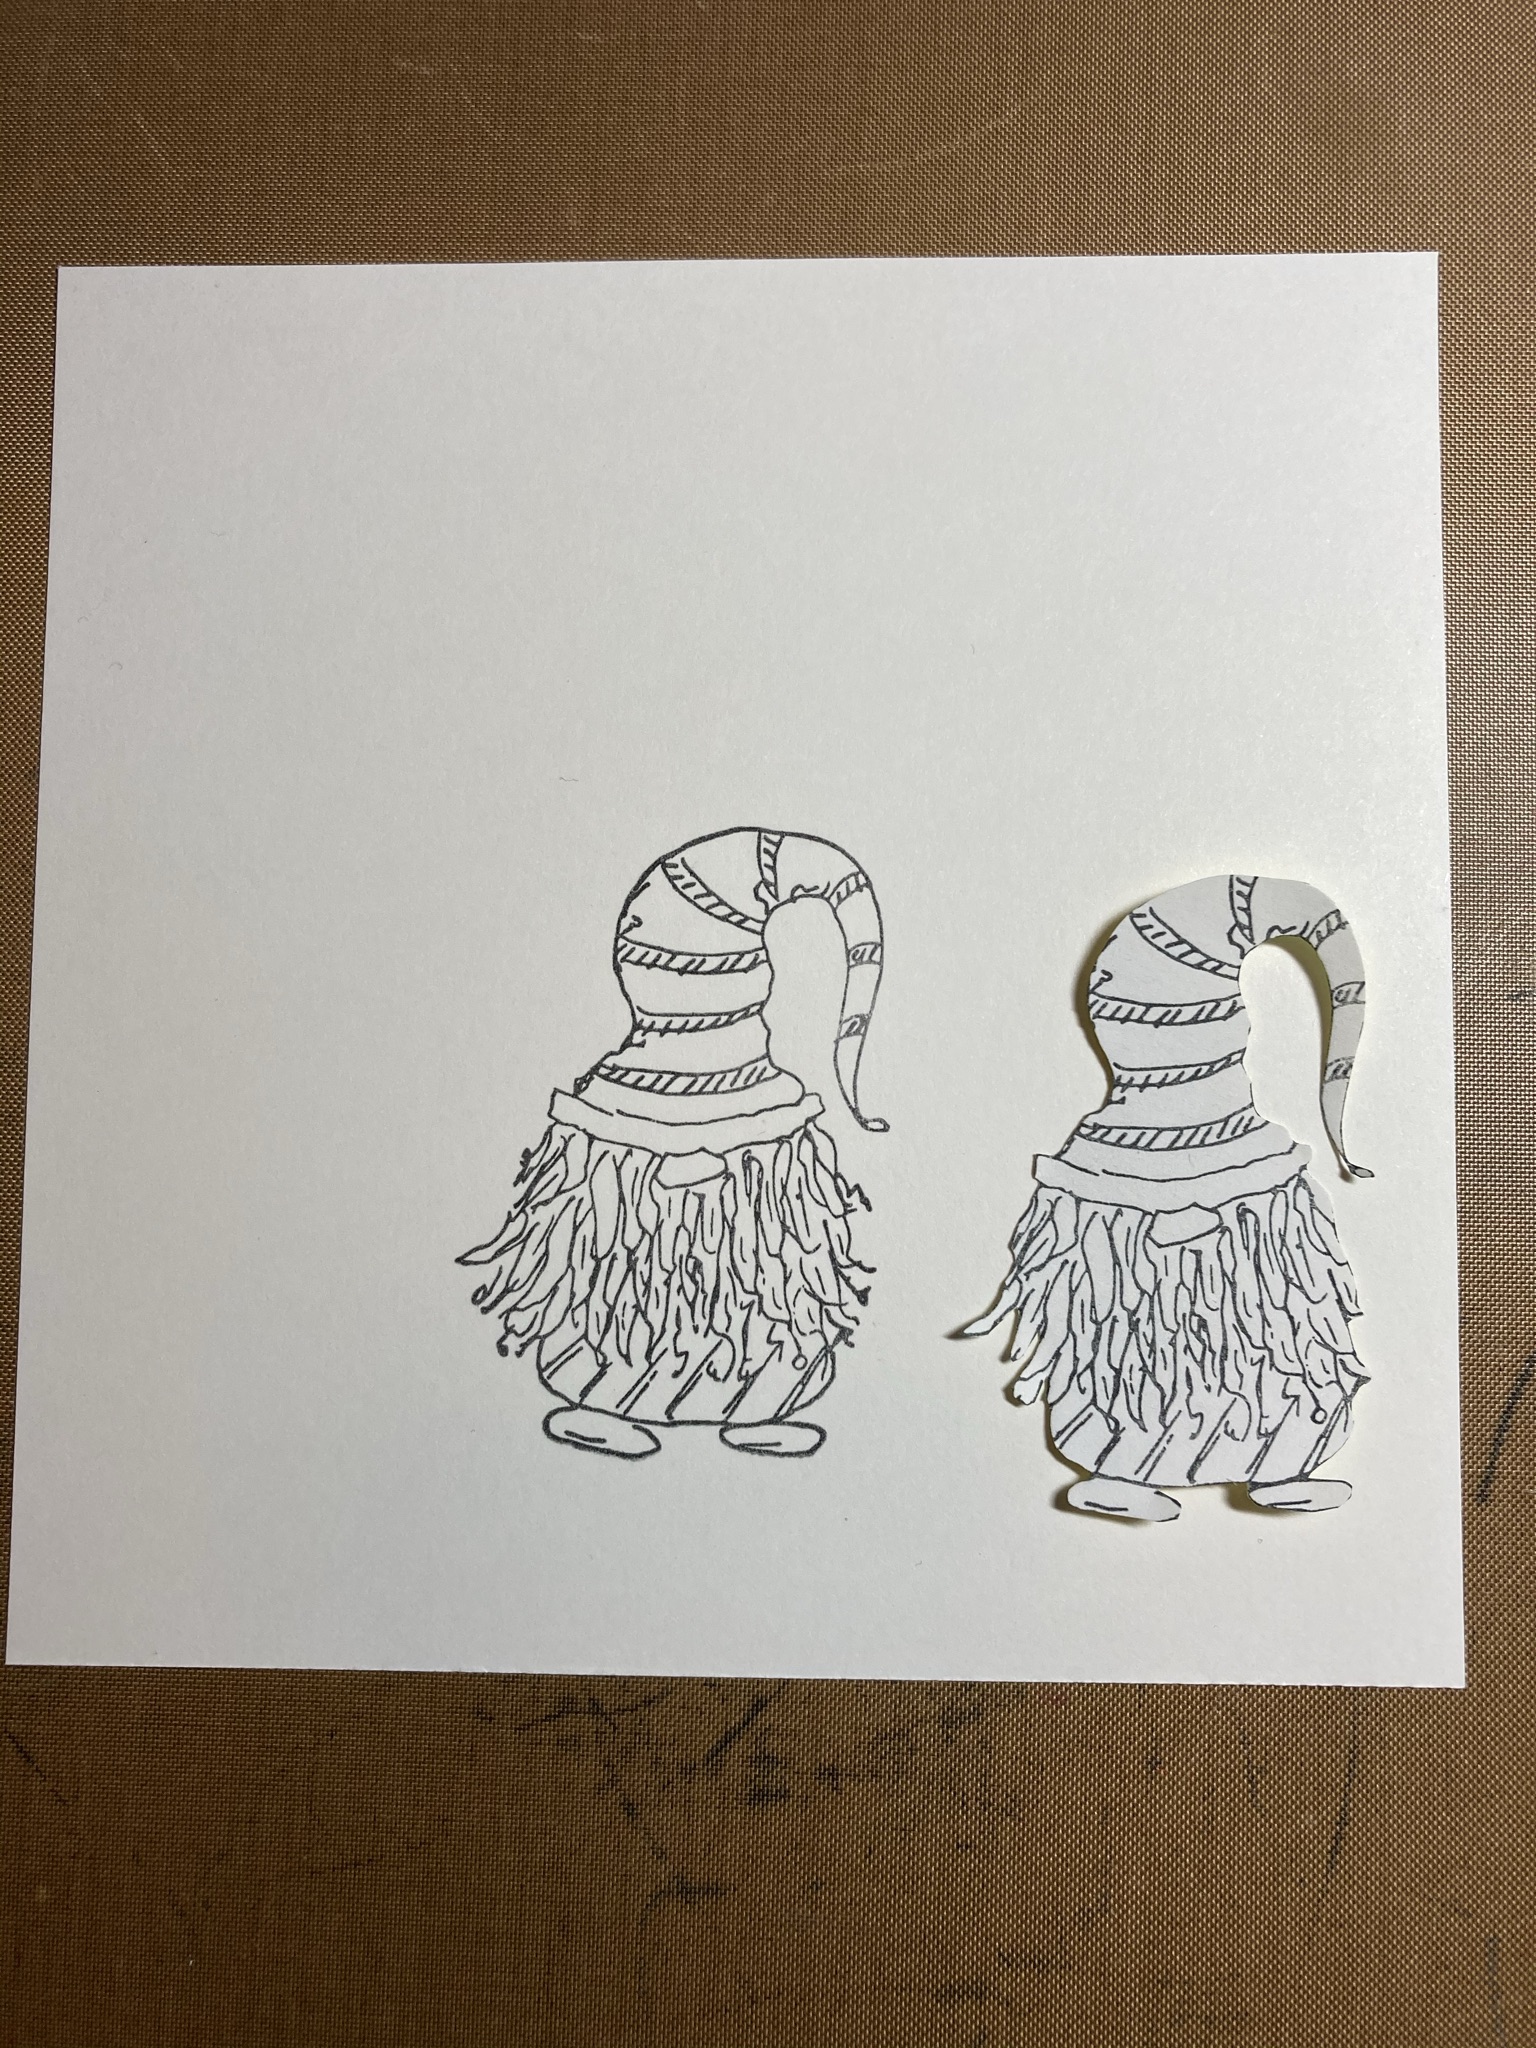
Wednesday, December 23, 2020
Stamp Anniething - Melanie with Ornaments Holiday Tag
Saturday, December 19, 2020
Paper Nest Dolls - Emma with Panda
Thursday, December 17, 2020
Blank Page Muse - Christmas Joy Holiday Dress Card
- Blank Page Muse Stamp: Christmas Joy Holiday Dress by Rick St. Dennis
- White cardstock to stamp your image.
- White cardstock (base card) cut to 8-1/2"W x 6"H. Score at 4-1/4" and fold in half.
- White cardstock (card front) cut to 3-1/2"W x 4-5/8"H - I used a die, but you can use a paper trimmer.
- Gold cardstock (mat) cut to 4-1/8"W x 5-7/8" H
- Red patterned paper or red cardstock cut to 3-7/8"W x 5-3/4"H
- Coloring medium of choice. I used Copic markers.
- Scissors
- Your favorite adhesive
- Paper trimmer
- 1 white and 2 red one-inch paper poinsettias
- Sentiment of choice
- The following embellishments are optional and/or can be substituted with what you have in your stash:
- Flourish die cuts (substitution can be leaves)
- Pine branch die cuts (substitution can be leaves)
- Glitter glue - I used Stickles in Crystal color (substitution can be any glitter glue)
- Glossy Accents (substitution can be Diamond Glaze)
- Sparkle pen - I used Spectrum Noir in clear color (substitution can be Wink of Stella)
- Skin: E04, E11, E21, E00, E000
- Hair: E49, E44, E42
- Red: R89, R59, R46, R24
- Green: YG97, YG95, YG93, YG91
- Yellow: Y38, Y15, Y11
- Turquoise: BG49, BG57, BG45
- Brown: E18, E15, E11
- White: T5, T3, T1, Blender
- Snow: T5, T3, T1, B00, B000, Blender
- Stamp image on white cardstock and color. Make sure you color the ground.
- Cut out the stamp, trimming close to the image and adhere to the white cardstock.
- Stamp the sentiment
- Adhere the gold cardstock (mat) to the base card
- Adhere the red patterned paper to the gold cardstock
- Cut out the flourishes and pine branches using gold cardstock and adhere them to the opposite corners (I ended up using only on branch per corner).
- Adhere the poinsettias on top of the flourishes and pine branches
- Add Glossy Accents to the ornaments/baubles
- Add glitter glue to the stars, feathers, holly, and zig-zag design on tree pots
- Add glitter pen to the hat, shoes, and dress
Monday, December 14, 2020
Conie Fong Art & Design - Angel Messenger
It's been a tough year for me this year as quite of few of my church friends have passed away. Knowing that they are in a better place brings me comfort. I try to send their families a sympathy card, but sometimes it's hard to find the right one. I have found Conie Fong Art & Design's Angel Messenger digital stamp just perfect for sympathy cards. The A2 size card I made is clean and simple so all you have to do is print and color and add a sentiment of choice.
There's a lot going on in the Conie Fong Art & Design Facebook Group! There are monthly challenges and give-aways! Check out the announcements for all the details. There is also a sale!! 30% off with minimum purchase of $5! Check it out!
I printed the digital stamp 3-1/4"H and let the computer auto-adjust the width so there wouldn't be any distortion in the image. I colored the stamp using Copic markers (colors listed below). I used a Thinking of You stamp for the sentiment. I used a scallop die to cut out the frame and trimmed my image to fit. I die cut out a white cardstock mat and then adhered all the layers to the base card. I die cut 3 purple and 3 white hearts and adhered 2 on the front and 4 inside (2 on opposite corners).
Copic markers used:
Hair: E29, E23, E11, E21
Skin: E04, E11, E21, E00, E000
Cheeks: R32, R30
Eyes: E35, E13
Purple: V17, V15, V01, V000
Green: YG45, YG25, YG03
Yellow: Y38, Y35, Y32
Doves: W3, W1, W0
Cloud: B93, B41, Blender
Saturday, December 12, 2020
Blank Page Muse - Bright and Colorful Holiday Ornament
- Blank Page Muse Stamps: Background Grunge Stamp Sheet by Pam Bray and Small Butterfly by Pam Bray
- Chipboard - either 30pt or 22pt
- Ornament die or circle die, minimum size 3". I used Lawn Fawn's Stitched Circle Tags Dies
- Black solvent ink, such as Staz-On
- Acrylic stamping block
- Washi tape
- White gesso
- Washi tape - this is for texture. Use any pattern.
- Distress ink or Distress Oxide: Squeezed Lemonade, Spiced Marmalade, Peacock Feathers, Seedless Preserves, Black Soot
- Distress ink applicator
- Distress Collage Medium or Mod Podge (matte or glossy)
- Strong white glue
- Glossy Accents or Diamond Glaze
- Paint brush
- Black 1/4" wide ribbon - approximately 9"
- Optional items: Charms
- Using an ornament or circle die, cut 2 die cuts with chipboard
- Using a paint brush, apply a thin layer of Gesso on one side of each of the die cuts. You will only need to do one side since we will be gluing these two pieces together. Let dry completely.
- Adhere the washi tape in various areas
- Apply another thin coat of Gesso and let it dry
- Using the black ink pad and background stamps, stamp a few of the background images. When stamping chipboard, I find it easier to place the chipboard on top of the larger stamps and rub it.
- Apply another thin coat of Gesso, making sure you can still see the stamps through the Gesso. Let it dry.
- Now stamp your focal stamps. Design your ornament how you like it! Let the ink dry.
- Apply the colorful distress inks in various places. Apply the Black Soot in on the edges of the ornament.
- Using a paint brush, apply a coat of the Distress Collage Medium or Mod Podge. Let it dry.
- Using a paint brush, apply a generous coat of Glossy Accents. Add the charm while it is still wet. Add a little extra Glossy Accents to make sure the charm is secure. Let it dry. NOTE: If you have charms that have the ring on top, break it off with two jewelry pliers. Hold the charm with one pliers and twist off the ring with the other pliers.
- Using strong white glue, adhere the two back sides together to form the ornament.
- Insert a charm in the ribbon and tie the ribbon onto the ornament. If you used a circle die, you will need to punch a hole and thread your ribbon through. Your masterpiece is done!
Friday, December 11, 2020
Rachelle Anne Miller Creative Studios - Animal Tree
Wednesday, December 9, 2020
Conie Fong Art & Design - Holiday Gnomes Tile Coasters
- Conie Fong Art & Design digtial stamps: Holiday Gnomes and Christmas Gnomes
- 4 white 4-1/4" x 4-1/4" ceramic tiles
- White Tissue Paper (1 large sheet, less wrinkles the better)
- Tape
- 2 sheets of 8-1/2" x 11" White Cardstock
- Mod Podge (Matte or Glossy)
- 1" Sponge Paintbrush
- Scissors
- Alcohol Markers
- Heat Gun (optional)
- Emery board or nail file
- Acrylic Enamel Spray - I used Dupli-Color Clearcoat Multi-Purpose Coating
- Use software of choice to print your images. Each digital image should be 3" tall. Set up your software so that it only prints two images per sheet. When you cut the tissue, the tissue will be 5" x 5".
- Smooth out the tissue paper and wrap it around the cardstock and tape it to the back. To lessen the bulk, cut the corners as shown below.
- Print the images. Do not remove them from the cardstock.
- Color the images with the tissue attached to the cardstock. The tissue is thin and will bleed through.
- Cut the images in 5" squares. DO NOT cut around the images. You won't be able to hide the cut lines.
- Clean the tops of the tiles with rubbing alcohol to remove dust and oils.
- Using your sponge paintbrush, apply a thin coat of Mod Podge onto the tile.
- Carefully place the tissue on the tile, centering the image. Starting from the center, gently use your fingers to press down the tissue paper. Try to get as much of the air out and smooth out the wrinkles. There will be wrinkles, this will add texture to your project!
- Carefully add a generous amount of Mod Podge to the top. Spread out the Mod Podge evenly, but don't rub it too hard or too long or you will tear the tissue.
- Let the tiles dry overnight or you can speed dry them with a heat gun.
- Using an emery board or nail file, trim off the excess tissue.
- Spray the acrylic enamel onto the tiles. Wait for 15 minutes then spray another coat (or whatever your spray directions indicate). Let the enamel dry and cure for a day or two before handling.
- For the bottom of the tile, add some felt feet so that the tiles don't scratch the furniture.
Thank you for stopping by and I hope you enjoyed this project. Happy Holidays! |
Sunday, December 6, 2020
Blank Page Muse - Let Your Light Shine!
Greetings BPM Fans! Did you know that gnomes are a symbol of good luck? Farmers still use them today to watch over livestock and crops. They place gnomes in the rafters of the barn or put them in their gardens. I just think they are so cute. Just check out this adorable one from Blank Page Muse called Gnome Starbright. This stamp set comes with a 5" tree and the sentiment, Let Your Light Shine. I colored him in Christmas colors, but you can color him any color for any occasion card or project.
I hope this card inspires you to enter the Blank Page Muse December Challenge, "Celebrate!" This is a really fun card to make!
- Blank Page Muse stamps: Gnome Starbright set
- Blank Page Muse stencil: Stars
- White cardstock cut to 12"W x 6"H, scored at 6", folded in half. This is the base card.
- Black cardstock cut to 5-7/8"W x 5-7/8"H for the mat.
- White bristol or watercolor paper cut to 5-3/4"W x 5-3/4"H.
- White cardstock for the sentiment
- Black cardstock to mat the sentiment
- Distress ink: Tumbled Glass, Stormy Sky, Faded Jeans, Black Soot
- Ink blending tools
- Water & paint brush or water spritzer
- Art Masking tape. I use Eclipse Art Masking Tape.
- Black ink pad
- White gel pen
- Coloring medium of choice. I used Copic markers.
- Transparent texture paste. I used Ranger Texture Paste/Transparent Gloss.
- Silver glitter - fine or extra fine
- Palette knife to apply texture paste
- Paper trimmer
- Scissors
- Using the bristol or watercolor paper, stamp the gnome toward the bottom of the paper.
- The gnome will need to be masked so that when the tree is stamped, a few of the branches will appear to be behind the gnome. Place a small piece of masking paper onto bond paper and stamp the gnome. Using scissors, cut out the gnome.
- For this card, a snow scene will be created so a mask needs to be created. Using a 6"W x 3"H piece of masking tape, place it on a piece of bond paper. Draw the snow across the masking tape then cut using scissors.
- Color the gnome with your favorite coloring medium
- After coloring the gnome, adhere the gnome and snow masks
- Using your blending tool and distress inks, ink blend the sky. use the lighter colors towards the gnome and darker colors towards the edges and corners.
- Spritz water onto the sky area making sure there are some "stars" of different sizes.
- Remove the snow mask, but leave the one on the gnome in tact.
- Tape the stencil onto the card then use the palette knife to spread a thin layer of texture paste. Lift off the stencil carefully. Let dry until before adding the big star.
- Stamp the sentiment, trim to size. Cut a mat using black cardstock.
- Adhere the mat and sentiment to the card front.
- Adhere the card front to the black mat.
- Adhere the black mat onto the base card.
- Using a white gel pen, add a few snowflakes in the sky and on the tree. the card is complete!