Thursday, September 30, 2021

Scrappy Boy Stamps: Christmas Ornament Tags

I love making Christmas tags that can be saved and used as an ornament for a tree or a decoration. I made these ornaments using the adorable Scrappy Boy Stamps' Away in a Manger stamp set. It has all the stamps to make a nativity scene or just cute tags with a few of the stamps. 


A couple of weeks ago, I shared a card with a nativity scene. At this time, I colored a double set of stamps to save to make these ornament tags. Please refer back to this blog post, called Away in a Manger, for all the Copic colors used. 

To make the ornament tag, I used a die from Lawn Fawn called Stitched Circle Tags. I used Distress Inks and Oxide Inks to create the background. Colors are listed below each ornament.


Distress Inks used: Seedless Preserves, Blueprint Sketch


Distress Inks used: Wild Honey, Chipped Sapphire, Seedless Preserves


Oxide Inks used: Tumbled Glass, Dusty Concord

To finish the tags, I added a ribbon bow, jute for the string, and a few sequins on each. I used a white gel pen to add a few stars. 

Thank you for stopping by and I hope you give these tags a try. Fun to make with the entire family! Have a great day and a very creative week.


Tuesday, September 28, 2021

Paper Nest Dolls: Happy Birthday Dahling!

Inspired by the most loved puppy movie, The 101 Dalmatians, Paper Nest Dolls has created this adorable stamp called Puppy Villain. This stamp is one of the four stamps from their Villain Collection and it comes in red rubber and digital formats. I thought it would be fun to put her on a birthday card, but you can use it for other occasions. Check out their other stamps in the amazing Villain Collection!


I created a 6x6 square card and used the digital version so that I can make her large (4 inches tall) so that the fur details can be seen on her coat. I used a combination of Copic markers and Prismacolor pencils to color this stamp. 


Copic Markers Used
Hair (Black): T9, T7, T5, T3; Hair (White): T3, T1, T0
Skin: E04, E11, E21, E00, E000
Dress: T9, T5, T2, T2
Purse: T5, T3, T1, T0
Earrings, Shoes & Cigarette Holder: R29, R22
Puppy: T5, T3, T1

Prismacolor Pencils Used
Fur Coat: PC1065, PC1063, PC1060, PC938
Supplies used:
  • Patterned cardstock is from Echo Park, Magic and Wonder
  • Dalmatian clipart is from clipart-library.com
  • Heart dies from Cricut Cuttlebug
  • Stitched rectangle die from Gina Marie Designs
  • I typed my own sentiment in Microsoft Word and printed it out.

This is a fun and easy card to make. I love using patterned paper from a paper pad since the colors are always coordinated. I hope you give this card a try!


Thank you for taking the time to stop by! Have a wonderful and creative week. 


Saturday, September 25, 2021

Blank Page Muse: Funny Cat Card

I had a cat that lived 17 years named Feisty. He was an awesome cat most of the time. He loved to play catch with a puff ball or a rolled up piece of paper. When he got older, he didn't play as much and I often thought he had an attitude! LOL! When I saw this stamp from Blank Page Muse, it reminded me of Feisty! This red rubber stamp is called Frederico Cat Words and Stencil Bundle designed by Donna Gray. The stamp set comes with a stencil. This funny cat is perfect for any cat or animal lover. You can save 15% on this stamp and all purchases at Blank Page Muse by using my special code BPMBetty. 


Supplies:
  • Blank Page Muse: Frederico Cat Words and Stencil Bundle designed by Donna Gray
  • A2 White Card Base
  • Card front: White cardstock 4.25"W x 5.5"H (I used an A2 stitched rectangle die)
  • Purple patterned paper of choice about 4"W x 6"H
  • White cardstock for sentiment about 3-1/2"W x 2"H
  • Your favorite coloring medium (I used Copic alcohol markers)
  • Black ink pad - use ink pad that is compatible with your coloring medium
  • Stamping block or stamp positioner
  • 3-1/4" (or 3") Circle Die (I used an in and out stitched circle die)
  • Purple texture paste (I used TCW Stencil Butter in Orchid)
  • Palette knife
  • Scraper
  • Light tack tape or washi tape
  • Purple sequins
  • Liquid glue
Instructions:
  • Cut out all the cardstock to the sizes indicated above
  • Stamp the image and sentiment
  • Using your favorite coloring medium, color the stamp. I used Copic Markers. Listed below are the colors I used.
    • Ears and nose: R20, R32
    • Fur: E74, W3, YR04, Y17, YR21, Y000
  • Fussy cut Frederico
  • For this next step with using texture paste or butter, work on a craft mat for easy clean up. Gather the patterned paper, paste, palette knife, scraper, and stencil. 
    • Tape the patterned paper onto the work surface. Place the stencil over the paper and tape it down so it won't move when stencil paste is applied.
    • Using a palette knife, apply the paste, ensuring the holes are filled in
    • Using the scraper, gently scrape ONE TIME and put the excess paste back in the jar
    • Carefully pull up the stencil. Let the stenciled paper dry for at least one hour. Do not use a heat gun. Quickly wash the stencil and palette knife with water and wipe up any paste from the craft mat. 
    • Using a circle die, cut a circle from the stenciled paper
    • Trim the sentiment to 2-7/8"W x 1"H. Using the patterned paper, create a mat 3"W x 1-1/8"H. Adhere the sentiment to the mat.
    • Adhere the stenciled circle onto the card stitched rectangular mat. Using double sided foam tape, adhere Frederico and the sentiment.
    • Adhere the card front to the card base
    • To finish the card, adhere the sequins. 


This is such a cute and fun card to make. I hope you give it a try! Thank you for visiting and have a creative week. 

Looking for more Inspiration? Click the links below!
The Blank Page Muse Shop https://blankpagemuse.com/

Thursday, September 23, 2021

Scrappy Boy Stamps: Have a very Merry Christmas

I just love the colors for a Victorian Christmas. Mauve, lavender, pink, rich red and dark green blends are my favorite Victorian colors. When Scrappy Boy Stamps came out with the Victorian Christmas stamp set, I was so excited to be able to color them up using my favorite colors! For today's card, I wanted to create a card with a fireplace. Back in those days, fireplaces were huge and very tall. These stamps are perfect for the fireplace die set I have from Hero Arts. 

The Victorian Christmas stamp set comes with a family of four characters and many stamps and sentiments to make a bunch of Christmas and winter-themed cards, scrapbook pages, and decorations. There are coordinating outline dies for this entire stamp set! 


To make this A2 card, I first stamped the stamps on white cardstock and then used the coordinating outline dies to cut them out. I then colored all the images with Copic markers.


Copic Markers Used
Woman
Skin: E04, E11, E21, E00, E000
Hair: E18, E08, YR18, YR14
Purple: BV17, BV04, BV02, BV00
Green: G45, YR03
Gray: T5, T3, T1

Wreath
Green: G28, G07, G21
Red: R59, R85, R83, R81
Pinecones: E25, E23, E21

Jack-in-the-Box
Yellow: YR15, Y15, Y13
Face: E11, E21
Red: R59, R85, R83, R81
Purple: BV17, BV04, BV02, BV00

Top and Present
Red: R59, R85, R83, R81
Yellow: YR15, Y15, Y13

Stockings:
Purple: BV17, BV04, BV02, BV00
White: T3, T1, Blender


For the fireplace, I used a die from Hero Arts and cut it out of watercolor paper. I used the following inks to color the fireplace:
Distress Ink: Fired Brick, Black Soot, Vintage Photo
Distress Oxide for the flame: Squeezed Lemonade, Wild Honey

For the floor, I cut on a piece of chipboard and swiped it with Distress Ink in Ground Espresso. The patterned paper is from Bo Bunny. 

For this A2 card, I cut a black cardstock mat then assembled all the pieces of the card and adhered everything down with liquid glue, except for the woman and the sentiment where I used double-sided foam tape. 

Check out this fabulous stamp set for all your Christmas and winter cards, scrapbook, journal, and art projects. 


Thank you for visiting today and I hope you have a very creative week! 


Monday, September 20, 2021

Stamp Anniething Design Team Day: Natalie - Lil' Devil

Over at Stamp Anniething, each Design Team (DT) member gets to color a stamp of their choice and make a project each month . This month I selected the adorable stamp, Natalie - Lil' Devil, and made a shaker card. It's time I get some Halloween cards made and this was the perfect stamp.


Stamp Anniething Supplies used:
I first stamped Natalie and the sentiment on white cardstock and colored her with Copic markers and fussy cut her out. I used my paper trimmer to cut the sentiment and matted it with orange cardstock.


Copic Markers Used
Skin: E04, E11, E21, E00, E000
Cheeks and Tongue: R20, R11
Hair: E49, E39, E19, E13
Red: R39, R29, R24, R22
Black: T0, T7, T5, T3

I then die cut all the pieces for the shaker. I cut 6 layers of black cardstock to build up the shaker so there was lots of room for the sprinkles. I cut the back piece of the shaker using the glitter cardstock in Geranium and the Spider Web Shaker add on in Twilight Black. I cut out all the patterned paper to fit an A6 card. The pumpkin paper is from Stamp Anniething and the orange and black polka dot paper is from Hobby Lobby. I used the lava border die for the top and bottom of the card. 


Thank you for stopping by and I hope you give this card a try. So fun to make shaker cards. Have a creative week! 


Saturday, September 18, 2021

Conie Fong Art & Design: Sending Pumpkin Wishes

It’s time to take the family to the pumpkin patch! When my kids were young, we used to always go to our local pumpkin patch where they had a train ride, hay ride, hay maze, and lots of pumpkins! This adorable digital stamp from Conie Fong Art and Design called Pumpkin Kitties, reminds me of those fun times. I love coloring bright and beautiful pumpkins and cute little kittens! You can get this newly released stamp is only $2 for a limited time and ALL STAMPS ARE 25% OFF in the store for a limited time (no coupon needed).


For this A2 card, I first printed the digital stamp and sentiment on white cardstock. I printed another image on masking paper and masked the stamp image. I then used a cloud stencil from Stamp Anniething and Distress Oxide in Tumbled Glass to create the clouds. I colored everything else using Copic markers.

Copic Markers Used
Pumpkins: E09, YR09, YR04, Y38
Stems: YG97, YG95, YG91
Grass: G17, G07, G03
Bow: V17, V16, V12
Kitten 1: W5, W3, W1 W00
Kitten 2: W5, W3, W1, E37, E35, E31
Kitten 3: W3, W1, E37, E35, E31
Kitten 4: E35, E31, E00, W1
Kitten 5: W4, W3, W2, W1
Cheeks and Ears: R20, R30, R11


After coloring the images, I cut it out using an oval die from Gina Marie Designs. I then cut out an oval scalloped brown mat using a die from Gina Marie Designs. I used my paper trimmer to cut out a brown cardstock mat for my A2 card base and then a fall patterned paper to put on top of the mat. The patterned paper is from Hobby Lobby. 

To finish the card, I trimmed the sentiment and added a brown cardstock mat. I adhered everything with liquid glue and the card was finished.


Thank you for visiting my blog and I hope you give this easy peasy card a try! Have a great and creative week. 

Thursday, September 16, 2021

Scrappy Boy Stamps New Release: Away in a Manger

For Christians, the true meaning of Christmas is the celebration of the Savior, Jesus Christ. We know that through belief in Christ we are daughters and sons of God and one day Heaven is going to be our home. My favorite type of Christmas cards are ones that have a nativity scene; one that shows the birth of Jesus. I am so in love with this new release set from Scrappy Boy Stamps called Away in a Manger! This set comes with all the cute stamps you see on my card, plus four other sentiment stamps. A must have stamp set for Christmas! 


I first stamped all the images on white cardstock, then used the coordinating outline dies to cut them out. I colored all the stamps using Copic markers.


Copic Markers Used

Mary
Skin: E04, E11, E21, E00, E000; Cheeks R20
Hair: E49, E44, E43
Blue: B26, B24, B23, B21
Brown: E39, E35, E31

Joseph
Skin: E04, E11, E21, E00, E000; Cheeks R20
Beard: E29, E25, E21
Blue: B26, B24, B23, B21
Gray: W6, W4, W2
Brown: E39, E35, E31

Jesus & Manger
Skin: E04, E11, E21, E00, E000; Cheeks R20
Hair: E49, E44, E43
Blue: B26, B24, B23, B21
Brown: E39, E35, E31
Yellow: YR24, YR23, Y13

Angel
Skin: E04, E11, E21, E00, E000; Cheeks R20
Hair: E39, YR27, YR24, YR21
Blue: B02, B01, B000, B0000
Yellow: YR24, YR23, YR21

King 1
Skin: E04, E11, E21, E00, E000; Cheeks R20
Beard: C9, C5, C3
Green: C09, C03, C02
Brown: E39, E35, E31
Red: R21, R20

King 2
Skin: E04, E11, E21, E00, E000; Cheeks R20
Hair & Beard: E29, E25, E21
Blue: B26, B24, B23, B21
Gold: Y23, Y17, Y15, Y11
Green: C09, C03, C02

King 3
Skin: E04, E11, E21, E00, E000; Cheeks R20
Beard: C9, C5, C3
Brown: E39, E35, E31
Red: R39, R35, R22
Blue: B26, B23, B21
Gold: Y23, Y17, Y15, Y11

Cow
Brown: E39, E35, E33, E31, E00
Pink: R21, R20
Blue: B26, B23, B21
Silver: Arteza gel pen

Sheep
Gray: W6, W4, W2
Pink: R20

Star: Y23, Y17, Y15, Y11

Stable (stamped on chip board)
Inside: E49
Outside: E44, E43, E41


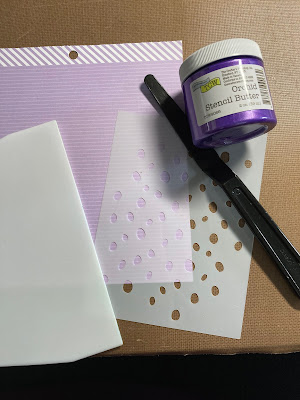
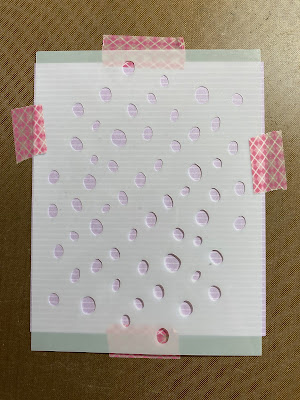
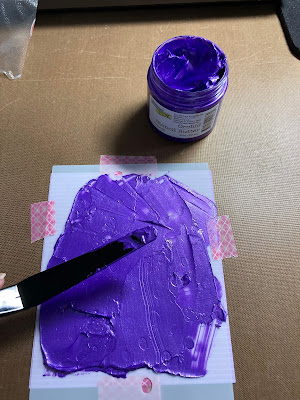
I created a slimline card base at 8-1/2"W x 3-1/2"H. I used the Gina Marie Designs Wonky Stitch slimline die to cut out the card front using watercolor paper. I ink blended this with Distress Inks in Stormy Sky, Faded Jeans, Chipped Sapphire, and Black Soot. I then splatted it with water and blotted it with a paper towel. To create the star rays, I used the Stamp Anniething Sun Ray Stencil and white pigment ink. 

I adhered the stamps onto the card front using a combination of liquid glue and double-sided foam tape. The images that I used the foam tape are King 1, King 3, Jesus, the angel, and the cow. To finish the card, I stamped the O Holy Night sentiment, trimmed it, inked the edges with Black Soot Distress Ink, and added a black cardstock mat, then adhered it to the card using double-sided foam tape. 


Such a fun stamp set to color and to make cards with! I hope you give this one a try! Thank you for stopping by and have a creative week!


Tuesday, September 14, 2021

Blank Page Muse: Beautiful Hummingbirds Make Me Happy!

I am lucky that I live in California where I see beautiful Hummingbirds most of the year. By late fall, they start migrating to warmer weather, typically to South America. We get quite a few of them in our backyard and it's fun to see them feeding on our flowering trees. I was so excited to see Blank Page Muse release this beautiful clear stamp set, called You Make Me Happy Hummingbird Clouds Flower Clear Stamp Set. This bundle comes with 5 stamps, 1 sentiment, and 1 stencil. A great stamp set you can use for many occasions by changing the sentiment. You can save 15% on this stamp and all purchases at Blank Page Muse by using my special code BPMBetty. 

Supplies:
  • Blank Page Muse: You Make Me Happy Hummingbird Clouds Flower Clear Stamp Set
  • Card Base, white cardstock: 3-1/5"W x 9-3/4" H; scored at 4-7/8"; fold in half for top folding card
  • Card front, white cardstock: 3-3/8"W x 4-1/2"H
  • Card mat, black cardstock: 3-1/2"W x 4-5/8"H
  • Card mat, cut using A2 scalloped edged rectangle die
  • White cardstock to stamp your stamps, approx 5" x 8"
  • Sentiment mat, black cardstock: 2"W x 1-1/4"H
  • Your favorite coloring medium (I used Copic alcohol markers)
  • Black ink pad - use ink pad that is compatible with your coloring medium
  • Stamping block or stamp positioner
  • Distress Oxides in Stormy Sky and Tumble Glass
  • Ink blending brush/pad
  • Your favorite adhesive
  • Double-sided foam tape
  • Optional: Jelly dots or enamel dots
Instructions: 
  • Cut out all the cardstock to the sizes indicated above
  • Stamp 2 of the flowers and 2 of the leaves stamps, one of each cloud, and one hummingbird
  • Using your favorite coloring medium, color all the stamps. I used Copic Markers. Listed below are the colors I used. 
    • Leaves: YG67, YG17, YG13, YG11
    • Flowers: G40, V05, V04,RV63, R81, RV00
    • Clouds: B01, B000, Blender
    • Hummingbird-
      • Blue: B06, B04, B02, B01
      • Green: YG17, YG09, YG03
      • Yellow: YR23, YR21, YR20
      • Purple: BV04, BV02, BV01, BV00
      • Pink: RV17, RV14, RV13, RV11
  • Fussy cut out all the colored images and set aside
  • Starting with Distress Oxide in Tumbled Glass, using a blending brush or pad lightly ink the center of the card front
  • Now ink the edges lightly with Distress Oxide in Stormy Sky
  • Using the cloud stencil and the Distress Oxide in Stormy Sky randomly add clouds to the card front. Have some of the clouds go off the page. Tape the stencil down with low-tack tape so the stencil doesn't shift. 
  • Adhere the card front to the black cardstock mat
  • Trim the sentiment to 1-7/8"W x 1-1/8"H and adhere to the sentiment black mat
  • Using your favorite adhesive, adhere the clouds, leaves, and flower to the card front 
  • Using double sided foam tape, adhere the sentiment and the hummingbird to the card front
  • Adhere the card front to the scalloped mat, then adhere to the card base.

  • Finish the card by adding a few jelly dots or enamel dots (optional)


Thank you for visiting today. This is a very fun and fast card to make. Have a very creative week!

Looking for more Inspiration? Click the links below!
The Blank Page Muse Shop https://blankpagemuse.com/


Monday, September 13, 2021

Scrappy Boy Stamps Sneak Peek: A Victorian Christmas

My favorite ornaments that are on my mom's Christmas tree are the older ones that I grew up with. Some have a Victorian look that I just love, especially the colors. I fell in love with this adorable new stamp set from Scrappy Boys Stamps called A Victorian Christmas. It comes with a family of four characters and many stamps and sentiments to make a bunch of Christmas and winter-themed cards, scrapbook pages, and decorations. This stamp set will be available/released on Thursday, September 16, 2021 at the Scrappy Boys Stamps store. 


I made a slimline card so that I can fit the family on the card, along with the tree and presents. I stamped all the stamps on white cardstock, cut them out using the coordinated outline dies, then colored them with Copic markers. I glued the ornaments onto the tree with liquid glue. 


Copic Markers Used

Mom
Skin: E04, E11, E21, E00, E000
Hair: E29, E25, E23, E21
Red: R59, R85, R83, R81
Gray: T7, T5, T3, T1

Dad
Skin: E15, E13, E11, E21, E00
Hair: E59, E57, E55, E51
Red: R39, R37, R35, R30
Gray: T7, T5, T3, T1

Girl
Skin: E04, E11, E21, E00, E000
Hair: E29, E25, E23, E21
Green: G99, YG97, G82
Red: R59, R85, R83, R81

Boy
Skin: E15, E13, E11, E21, E00
Hair: E59, E57, E55, E51
Red: R37, R35, R32
White: T3, T1, Blender
Gray: T7, T5, T3, T2

Tree: BG99, G94, G07, G24
Tree trunk: E25, E23, E21
Planter: Red-R59, R85, R83, R81, Blue-B37, B34, B32

Presents: Arteza gel pens in various colors


I used a slimline card base that measures 7-3/4"W x 3-3/8"H and used a slimline frame die from Stamp Anniething to cut a red cardstock frame. I added pattern paper from CC Designs to make it look like wallpaper. I used Distress Ink in Vintage Photo to create the floor then added a strip of white cardstock for the floor board trim. To finish the cards, I stamped the Christmas Greeting sentiment inside the card. 


I hope you enjoyed this card and give this card a try! It's a beautiful set to make all your 2021 Christmas and winter cards!

Have a great week and a very crafty one! 

Thursday, September 9, 2021

Conie Fong Art & Design: Trick or Treat with Penelope Pumpkin

Halloween is one of my favorite holidays. I look forward to seeing the kids and adults in costumes. Last year, due to COVID-19, we decided it was safer not to hand out candy. I just hope the pandemic improves so that I will be able to pass out candy. This year, Halloween lands on a Sunday, so we do hope there will be plenty of kids! I also love making Halloween cards. Today's card features the adorable digital stamp from Conie Fong Art & Design called Penelope Pumpkin. This set comes with two stamps, one with this cute monster candy bag and the other one with a polka dotted bag. ALL STAMPS ARE 25% OFF in the store for a limited time (no coupon needed).


I first printed the stamp on white cardstock and colored it with Copic markers.


Copic Markers Used
Skin: E13, E11, E21,E00, E000
Hair: E49, E47, E44, E42
Cheeks: R20, Lips: R21, Eyes: E23, E31
Green: YG17, YG07, YG03
Orange: Y38, YR04, YR09, E09
Black: C7, C5, C3
Gray: C5, C3, C1
Cat: C5, C3, C1, C00, R20
Candy: R24, R20
Ground: E34, E31

After coloring the stamp, I used an oval stitched nesting die to cut it out. I then cut out a black cardstock mat with the next larger die. I cut out a black mat and patterned paper from Stamp Anniething to put on layers to top of the A6 size card base. 


I used an old Trick or Treat sentiment stamp from my stash and punched it out using a circle punch. I then used a larger punch to cut out a black cardstock mat for the sentiment. All layers are adhered using liquid glue. To finish the card, I added a few enamel dots. 

Thank you for stopping by! Have a creative week!