Project 1: Queen of Snow - Have a Super Cool Birthday
Scrappy Boy Stamps products used:
- Queen of Snow stamps and dies
- Falling Snowflakes Background Stencil
- Grass and Clouds Edger Die
- Stitched Rectangle Die
Supplies used:
- White A6 card base
- Blue cardstock for mat/panel
- White cardstock to emboss with Falling Snowflakes Background Stencil
- White cardstock to die cut snow from Clouds Edger Die
Prismacolor pencils used:
Man
- Skin: 943, 939, 927
- Cheeks: 929
- Eyes: 945
- Hair: 944, 943, 918, 1003
- Blue: 901, 906, 904, 1023
- Gold: 1034, 916, 997
- Brown: 946, 947, 941, 1083
Woman
- Skin: 943, 939, 927
- Cheeks: 929
- Eyes: 919
- Lips: 924
- Hair: 1084, 942, 916
- Dark Blue: 901, 902, 904
- Light Blue: 903, 919, 1023
Reindeer
- Dark brown (nose): 947, 946, 941, 1083
- Brown (beard): 043, 941, 1083
- Brown (eyes, antlers, ears): 1074, 1072, 1069
- Brown (legs): 1074, 1072, 1069, 946, 947
Snowman
- Cut the blue cardstock panel leaving a 1/8" border and adhere to the card base.
- Use the Falling Snowflakes Background Stencil, emboss the white cardstock using a die cut machine (I used Sizzix Big Shot). Adhere to the blue cardstock.
- Die cut the snow using the Clouds Edger Die. Adhere to the embossed panel.
- Adhere the colored stamps and sentiments as shown.
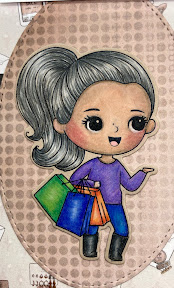
Project 2: Cute Girls Shopping - Three Easy Mini Slimline Cards
Scrappy Boy Stamps products used:
- Cute Girls Shopping stamps and outline dies
- 6x6 I Love Shopping Paper Pack
- Stitched Oval Dies
Supplies used:
Girl 1
- Skin: 946, 941, 945, 943, 939, 928
- Cheeks: 924
- Hair: 935, 1065, 1063
- Purple: 932, 1007, 1008
- Blue: 933, 906, 902
- Black (boots): 935, 1065, 1063
- Green: 909, 912, 1021
- Orange: 922, 918, 1013
- Blue (bag): 933, 902, 1023
Girl 2
- Skin: 943, 939, 927
- Cheeks: 928
- Tongue: 929
- Hair: 945, 1034, 942, 916
- Blue: 903, 904, 1023
- Gray (computer): 1054, 1051, 949, 938
- Brown: 946, 941, 1083
Girl 3
- Skin: 943, 939, 927
- Cheeks: 928
- Hair: 937, 944, 1034
- Dark Pink: 995, 994, 928
- Blue: 901, 1027, 1023
- Gray: 1065, 1063, 1060
- Light Pink (mouse pad): 929, 928
- Blue (computer screen): 904, 1023
- Yellow: 916
- Brown: 946, 941, 1074, 938
Notes (for each card):
- Score patterned paper at 3" then fold in half.
- Adhere white cardstock to the inside of the card for messages.
- Cut a strip of solid cardstock 3" x 1-1/4" and adhere to center of card.
- Use the Stitched Oval Die to cut oval from patterned paper and adhere to center of card.
- Adhere the colored stamps and sentiments to the card.
Project 3: Blondie's Adventures - Never Stop Dreaming
Scrappy Boy Stamps products used:
- Blondie's Adventures stamp and die
- Rapunzel Boat Die
- Sky Lanterns Layered Stencil Builder
Supplies used:
- 6x6 white card base
- Black cardstock mat/panel
- Black cardstock to die cut Rapunzel Boat Die
- White Bristol cardstock for stenciling
- Distress inks for background: chipped sapphire, stormy sky, blueprint sketch, dusty concord, black soot.
- Distress inks for lanterns: wild honey (layer 1), picked raspberry (layer 2), black soot (edges of card)
- Brutus Monroe Glow in the Dark Embossing Powder (stencil layer #3)
- White and Gold paint pens.
Notes:
- Cut the black cardstock panel leaving a 1/8" border and adhere to the card base.
- Cut the Bristol cardstock leaving a 1/8" border. Using the Distress Inks listed above, ink the background.
- Using the Sky Lanterns Layered Stencil Builder, stencil the cardstock using the Distress Inks listed above for Layers 1 and 2.
- For layer 3, heat emboss the Glow in the Dark Embossing Powder.
- Adhere the Rapunzel Boat Die, sentiment, and colored stamp onto the card.
- Add some gold and white "stars" to the card with the gold and white paint pens.
Thank you so much for stopping by! I hope you give these projects a try. They're fun to make! Have a creative day!


No comments:
Post a Comment