

Supplies:
- Blank Page Muse Stamp: Classic Christmas Stamp Set
- White cardstock - Cut to A2 size for the base (8-1/2" x 5-1/2"), fold in half
- Brown cardstock - Cut to 4-1/8" x 5-3/8" for the mat
- White cardstock - Cut to 4" x 5-1/4" to stamp image
- White cardstock - Cut to 2" x 1-1/8" to stamp sentiment
- Brown cardstock - Cut to 2-1/8" x 1-1/4" to mat sentiment
- Masking tape (I used Eclipse Art Masking Tape)
- Black ink pad
- White gel pen
- Favorite coloring medium (I used Copic markers. Colors listed below)
- Favorite adhesive
- Adhesive foam squares or dots
- Paper trimmer
- Corner punch
- Stamp positioner or stamping block (I used a stamp positioner)
- Optional items: Snowflake embellishment
Copic Markers Used:
- Deer: E18, E15, E13, E11, E00
- Wreath and pine needles: G28, G94, G07, YG03
- Fence and pine cones: E47, E44, E43, E42
- Snow: BV31, C1, B000, 0
- Holly berries: R29
- Sky: B000, B0000
Instructions:
- Stamp the deer onto the masking tape and fussy cut close to the edge. You don't need to cut above the wreath on the left side. You will need to mask the deer so that when you stamp the fence, it will appear behind the deer.
- Stamp the deer onto the 4" x 5-1/4" cardstock.

- Place the mask over the stamped deer
- Position the fence stamp so that it lines up with the hooves of the deer and stamp the image.

- Peel off the mask.
- Stamp the pine cones at the top of the page.
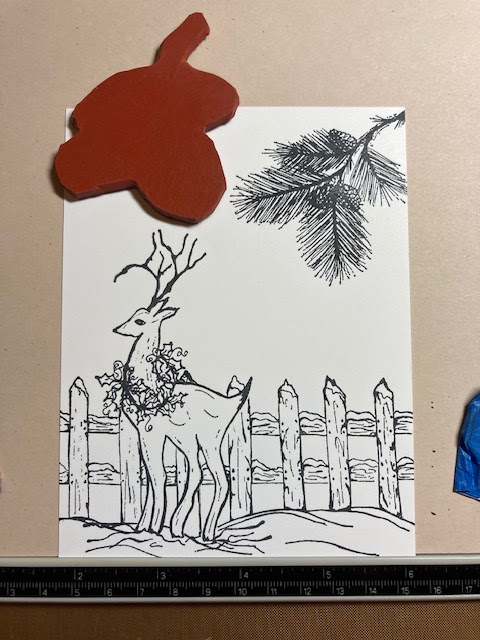
- The image is ready to color. Start by coloring the deer.
- Color the wreath. After coloring the wreath, add holly berries. If you are using alcohol markers or water-based markers, use a white gel pen to make the holly berries. Let it dry, then use a red marker to color over the white gel pen to make the berries. If you are using colored pencils, use a white pencil to make the berries first, then use the red pencil.


- Color the snow. Don't forget the snow on the fence.
- Color the fence
- Color the sky. Make sure the sky is colored BEFORE you color the pine cones and branches.
- Color the pine cones then the pine needles.

- Stamp the sentiment onto the 2" x 1-1/8" white cardstock.
- Using the corner punch, punch the corners that are diagonal from each other. Do the same with the 2-1/8" x 1-1/4" brown card stock. Adhere the sentiment onto the brown cardstock.
- Use foam squares or dots and adhere the sentiment to the card front.
- Adhere the card front to the 4-1/8" x 5-3/8" brown cardstock.
- Adhere the card onto the white base card.
- Optional: Add a snowflake embellishment or any embellishments you wish.

No comments:
Post a Comment