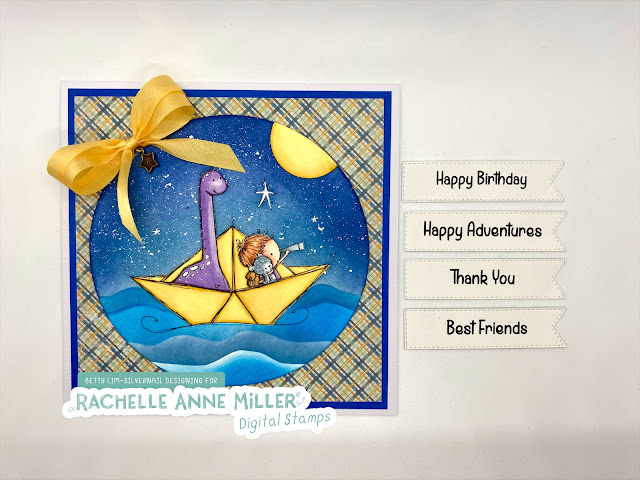
Here's how I made the 6"x 6" card:
- First, I created a mask for the digital stamp: I used my 6" roll of Eclipse masking tape and cut off a piece about 5". I placed that on the top left corner of a piece of copy/bond paper. Using Microsoft Publisher (you can use Word), I made sure the image was on the top left corner and printed the image on the masking tape. With the mask on the cardstock, cut out the image using scissors.
- I printed the digital stamp on cardstock. I used my Silhouette Cameo to cut it out in a circle. If you don't have an electronic cutter, just place a circle template over the image and cut out the circle or you can use your paper trimmer to cut it out in a square or rectangle. Put the mask over the image.
- I used a 1-3/8" circle punch and created a mask for the moon. I placed a small piece of masking paper over cardstock and punched out the circle then put the mask over the edge of the the cardstock where I wanted the moon.
- To create a mask for the water part of the card, I put a 5" piece of masking tape on cardstock and just hand cut a wavy mask. I put the mask on the bottom portion of the cardstock.
- I used Distress Inks (colors listed below) to create the sky. Be careful you do not lift any parts of the masks, when inking. I stared off with the light color in the middle then the darker color towards the outside of the circle. Using white acrylic paint, I splattered on some additional stars. I used the acrylic white paint to paint the bigger stars white since they were inked. I let this dry a few minutes before continuing.
- Carefully removed the mask covering the water. I used this piece to mask off parts of the water to ink blend. To ink blend the water, I first masked off the sky. You can use scraps of masking paper just to mask off the section between the sky and water. You don't need to mask the entire sky.
- Using the cardstock I used to cut the mask for the water, I used it like a stencil to ink blend the water. If you have a wave stencil, you can use that.
- I colored the digital stamp and moon with Spectrum Noir Illustrator markers (colors listed below).
- To finish the card, I cut out 2 card layers plus the base card in the following sizes: 1) 6"x6" white cardstock; 2) 5-3/4" x 5=3/4" solid cardstock (blue); and 3) 5-1/2" x 5-1/2" patterned paper/cardstock. I glued it all together and added a bow and a charm.
- I will add a sentiment from my stash when I use my card.
Have fun making this card. Thank you for visiting!
Copic markers used:
Hair: TN7, TN5, TN2
Skin: AP3, FS8, FS7, FS6, FS9
Cheeks: FS4
Dinosaur, boy's shirt (Purple): DP3, HB2, HB1
Teddy Bear, Telescope: BGR3, BGR1, Blender
Backpack (Brown): GB9, GB7, GB2
Boat, Moon (Yellow): GY3, GY1, LY1
Distress Inks used:
Sky: Faded Jeans, Chipped Sapphire
Water: Salty Ocean, Stormy Sky


Love it. This is so cute and your touch with the little charm is such a nice touch.
ReplyDeleteThank you Silvia. You know how I love charms!
Delete