- Stitches Frond Witch Words stamp designed by Stephanie Eaton
- A6 white card base
- Watercolor paper cut to 4-3/8"W x 6"H
- White cardstock cut to 3"W x 4-1/4"H for the background (I used a stitch rectangle die)
- Black cardstock cut to 3-1/8"W x 4-3/8"H to mat background
- White cardstock 3"W x 4"H to stamp image
- White cardstock 2-1/8"W x 1-3/8"H to stamp sentiment
- Black cardstock 2-1/4"W x 1-1/2"H to mat sentiment
- Distress Ink or Distress Oxide: Seedless Preserves, Black Soot, Mowed Lawn
- Ink blending brushes and/or blending tool with foam pad
- Clouds Stencil
- Grass Stencil
- Water spray bottle
- Coloring medium of choice. I used Copic markers.
- Your favorite adhesive
- Foam dots or squares
Instructions:
- Stamp the witch image and color with medium of choice. I used Copic markers. Colors are listed below the photo.
Purple: V17, V15, V12
Green: G09, G05, G03, G00
Orange: YR18, YR15
- To make the background, first use a cloud stencil and Distress Inks in Seedless Preserves and Black Soot, alternating the colors. Stencil 3/4 of the cardstock.
- Next, use a grass stencil and Distress Oxide in Mowed Lawn. Make the grass darker in the front than the back.
- Stamp the sentiment and use the Distress Ink in Black Soot to ink the edges. Adhere it to the black cardstock mat.
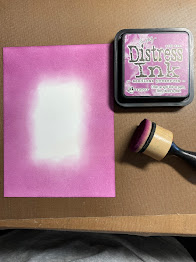
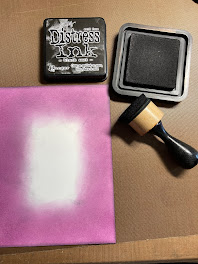
- Using the watercolor paper, ink all of the cardstock except for the center with Distress Ink in Seedless Preserves. Using Black Soot, ink the edges.
- Remove the water sprayer from the bottle and add some droplets of water onto the watercolor paper. Use a clean paper towel to remove the water so the ink shows the water droplets.
- Assemble all the card layers to the card base using your favorite adhesive. Add the sentiment with foam squares or dots.
Be sure to follow Blank Page Muse at:
The Blank Page Muse Shop https://blankpagemuse.com/
FB Fan Page https://www.facebook.com/groups/bla...
Instagram - Shop https://www.instagram.com/blankpage...
Instagram - Blog https://www.instagram.com/blankpage...


So cute! I love the colors.
ReplyDelete