
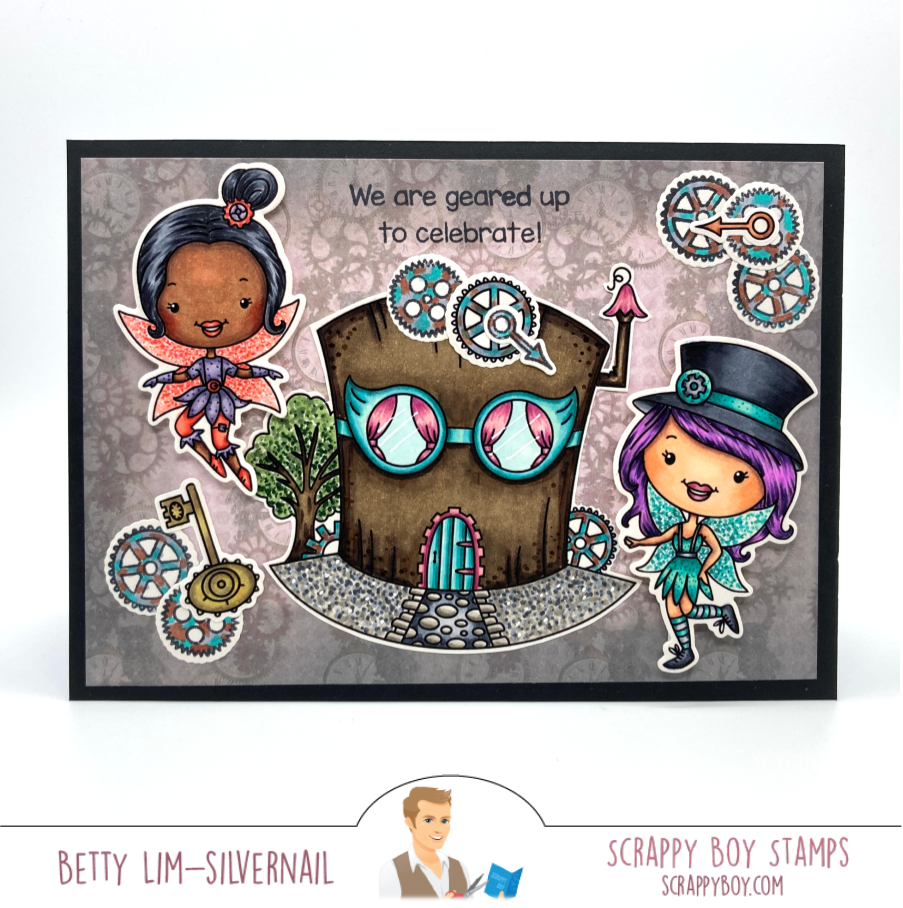
The first card is an A6 size birthday card where I used the Steampunk Fairy Hat House digital stamp and two steampunk fairies. The Fairy Hat House is available only as a digital stamp so that you can make it as big or small as you like.
The second card is an A2 size congratulations card where I used the cute girl that's a seamstress. I used some large letter dies to cut out the word woohoo to put on the card.

Card 1: We Are Geared Up to Celebrate!
I first stamped all the images, colored them with Copic markers, then cut them out using the coordinating outline dies.
Copic markers used:
Fairy 1:
Skin: E27, E25, E23, E13
Cheeks: R22
Lips: R22, R20
Hair: C9, C7, C5, C3
Purple: V28, V25, V22, V20
Red: R24, R22, R21

Fairy 2:
Skin: E04, E11, E00, E50
Cheeks: E95
Lips: R85, R83, R81
Hair: BV08, V17, V15, V04
Blue green: BG18, BG15, BG11
Dark Gray: C7, C5, C3
Light Gray: C3, C1

Fairy Hat House:
Brown: E49, E47, E44, E43
Aqua: BG18, BG15, BG53, BG11
Pink: RV66, RV34, RV32
Gray: C5, C3, C1, W4, W1

Clock Hand: E17, E13, E11
Keys: B000, Y28, E43, E41, Y21
To create the background, I used one of the sheets of patterned paper from the Steampunk Fairies Paper Pack and used Distress Oxide in Hickory Smoke to ink the edges. I used a stamping platform to stamp the sentiment. I then adhered this onto a black cardstock mat.

I assembled all the colored stamps onto the card front then adhered them using liquid glue, except for the two fairies, where I used double-sided adhesive foam tape to pop them up. To finish the card, I adhered the card front onto an A6 white card base.

Card 2: Congratulations! That's Sew Amazing!
I first stamped all the images, colored them with Copic markers, then cut them out using the coordinating outline dies.
Copic markers used:
Skin: E04, E11, E00, E50
Cheeks: E93
Hair: E37, E35, E34, E31
Pink: RV34, RV11, RV52, RV00
Green: YG17, YG03, YG01
Brown: E57, E55, E53

For the background of this card, I used patterned paper called Sew Lovely from Carta Bella. I used the Scrappy Boy Stamps A2 Stitched Scalloped Edge Die to cut out this card panel. I also used this paper to cut out the word woohoo using Annie's Alphabet from Stamp Anniething. Then I cut another woohoo out of white craft foam so that I can raise the letters on the card. I used liquid adhesive to glue the patterned paper letters to the foam letters.

I placed the letters on the card to determine how much space I needed at the top before I stamped the sentiment. After stamping the sentiment, I adhered the woohoo word above it.
At this point, I added a pink ribbon and bow onto the front panel. I wrapped the ribbon and taped it to the back. I created a bow and glued it onto the ribbon.
I cut out a 3" circle, using the reverse side of the patterned paper. I trimmed part of the circle by using the Stitched Scalloped Edge Die and then adhered it to the card. I used double-sided adhesive foam tape to adhere the cute girl. To finish the card, I adhered the card front onto a white A2 card base.

Both cards are easy to make with the use of patterned papers! So fun to make and mass produce. Thank you for visiting today and I hope you give these two cards a try! Happy crafting!
You are a super talented lady!!
ReplyDeleteThank you for the sweet comment!
Delete