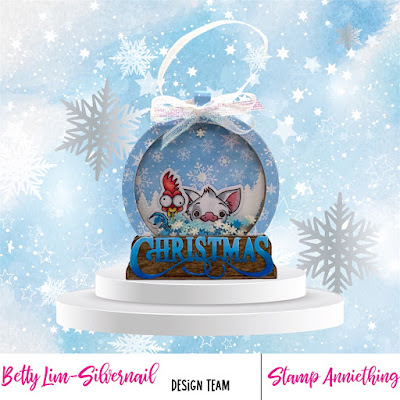
This month's Stamp Anniething release was inspired by the amazing Polynesian mythological film, Moana! This stamp set, called How Far You'll Go, is perfect for making holiday cards, ornaments, and decorations! I am sharing a snow globe ornament I made using the two smaller stamps, Hei Hei and Pua. This ornament will make a great gift too! Fast and easy to make.
Stamp Anniething products used:
- How Far You'll Go stamps and outline dies
- Christmas Word Die
- Shaker Basics Winter Add on (Snow Globe)
- Shaker Basics Set #1 (retired)
- Clay shaker bits and Itty Bitty Beads (retired) - use what you have, such as sequins, beads, etc.
Supplies used:
- Chipboard to create shaker/snow globe
- Acetate for window of shaker/snow globe
- Christmas patterned paper of choice (I used some from Hobby Lobby)
- White cardstock for back of snow globe
- Ribbon
Copic markers used:
Hei Hei
- White: C3, C1, 0
- Yellow: Y38, Y35, Y13
- Blue: B05, B02, B00
- Red: R37, R35, R32
Pua
- White: C3, C1, 0
- Gray: C5, C3, C1
- Pink: R85, R83, R81
Christmas Word Die: B16, B14, B12
Notes:
- Die cut the Christmas Word Die, color and set aside.
- If using clay sprinkles, cut at least 6 layers of chipboard for the shaker/snow globe. Die cut one piece of acetate. Assemble/create the shaker.
- Cut a front and back for the snow globe base using chipboard. Swipe on the distress ink using the ink pad. Glue one in front and one to the back of the snow globe. Adhere the Christmas word die cut.
- I used the label die that came with the Shaker Basics Winter Add on (snow globe) to use as the ornament holder. I folded the label in half and glued it to the snow globe as a hanger for the ribbon. Feed about 7 inches of ribbon and tie a knot. Hide the knot inside the folded hanger.
- Create a bow and glue to the top of the snow globe.
Thank you for stopping by! Have a creative day!


No comments:
Post a Comment