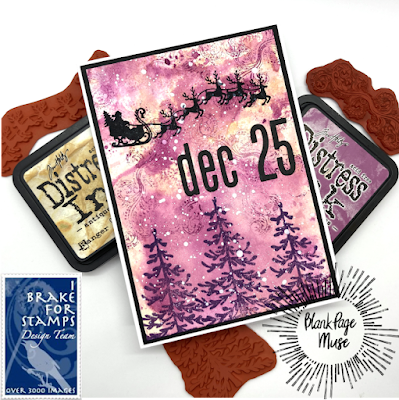
You can save 15% on these stamps and all purchases at Blank Page Muse and at I Brake for Stamps by using my special code BPMBetty.
Supplies:
- Blank Page Muse/I Brake for Stamps: Santa on Sled with Reindeer Art Silhouette; Tree stamp from Sir Holiday Gnome Tree No Place Like Gnome; Fancy Swirl Stamp from Background Grunge
- A6 White card base
- Black cardstock mat: 4-3/8"W x 6-1/8"H
- White watercolor cardstock card front: 4-1/8"W x 5-7/8"H
- Black cardstock for die cutting sentiment: 3" x 3"
- Distress Inks in Antique Linen, Seedless Preserves, Dusty Concord
- Water spray bottle
- Craft mat
- Heat gun
- White acrylic paint
- Stiff paint brush
- Acrylic stamping block
- Stamp positioner (optional)
- Black stamp pad - dye ink
- Ruler (optional)
- Washi tape (optional)
- Alphabet and number dies (I used Sizzix Tim Holtz Alphanumeric Classic Lower dies)
- Die cutting machine
- Your favorite adhesive
Instructions:
- Ink Smoosh the card front using watercolor cardstock
- Using the Distress Inks, starting with Antique Linen, apply ink onto the craft mat. Spritz with water until beads appear then place your paper onto the ink and smoosh it around.
- Dry the ink using a heat gun
- Repeat the above steps using Seedless Preserves and then Dusty Concord until the desired look is achieved.
- Place the inked paper into a stamp positioner or using an acrylic block, stamp three trees towards the bottom of the cardstock using the Distress Ink in Dusty Concord.
- Place the Fancy Swirls stamp onto an acrylic block and randomly stamp over the sky area using Distress Ink in Seedless Preserves. For texture, don't re-ink the stamp each time, just use the ink that's left on the stamp (second generation stamping).
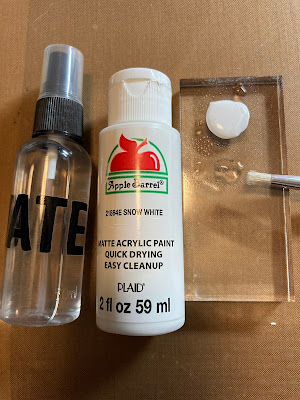
- Using the acrylic block, spritz some water onto it then put a dab of white acrylic paint and mix with a stiff paint brush. Then flick the paint off the edge of the block and onto the card front for the snow.
- Using the black ink pad and stamp positioner or acrylic block, stamp the Santa on Sled with Reindeer stamp onto the card front towards the top of the card.
- Cut out the dec 25 sentiment out of black cardstock using the alphabet and number dies. To make it easier to line up, adhere the dies to washi tape after aligning them on a ruler. Place it onto the cardstock and run it through a die cut machine. Add glue to the letters and numbers and place it onto the card front then remove the washi tape.
- Assemble the card by adhering the black cardstock onto the card base and then the card front onto the black cardstock and the card is finished.
I hope you give this card a try. So fun to ink smoosh and stamp! Thank you for stopping by and have a creative week!
Looking for more Inspiration? Click the links below!
I Brake for Stamps Shop https://ibrakeforstamps.com/


No comments:
Post a Comment