Wednesday, March 24, 2021

Scrappy Boy Stamps: Supercalifragilistic!

About a month ago, my friend Sean Covert, also known as Scrappy Boy, fulfilled his dream of having his own line of stamps. His first stamp set is called Practically Perfect, and it is based on everyone's favorite British Nanny. He has quite a fan following as the "behind the camera" host, computer guru, and social media expert for Stamp and Scrapbook Expo @Home so his stamps sold out in three hours after it was released! Congratulations Sean!

I was a little bummed as I was too late in ordering and had to wait another week for more stamps to be available, but it sure was worth the wait! This clear stamp set comes with 7 cute stamps and 9 sentiment stamps so you can make lots of cards, scrapbooks, and party decorations.


I could not decide which of the character stamps to use, so I decided to use them all, along with a few sentiment stamps. Then I decided to create an evening scene so I opted to make a very large A9 sized card (8.5"W x 5.5"H). I colored the stamps using Copic markers. 


Copic Markers Used:
For all characters
Skin: E04, E11, E21, E00, E00
Cheeks: R20, R30

Chimney Sweeper:
Hair: E59, E25, E33, E31
Black (Hat, Jacket, Shoes): T7, T5, T3, T1
Red: R59, R37, R24, R32
Brown: e47, E44, E43, E42
Chimney sweep handle: E47, E44, E42

Girl:
Hair: E39, YR24, YR23, RY20
Hat & Socks: YR27, YR12, YR02, YR01
Dress: YR09, YR04, YR000
Shoes: E25, E33, E21
Balloon: R59, R37, R24, R32

Boy:
Hair: E25, E33, E31
Hat, jacket, pants, socks: B97, B95, B93, B91
Shirt: T3, T1
Shoes: T7, T3, T1
Kite: Y38, Y35, Y13

Nanny:
Hair: E25, E39, YR23, YR20
Hat, Overcoat, Shoes: R59, R37, R24, R32
Dress: B97, B95, B93, B91
Purse: T3, T2, T1, Daisies: Y38, Y13, T3, T1, Blender
Umbrella: T5, T3, T1, B93, YG67

After coloring the stamps, I masked them to create the cobblestone walkway and houses using stencils from Stamp Anniething. Then I used distress inks to create the sky. 


Distress Inks used:
Cobblestone walkway: Brushed corduroy, Walnut stain
Sky: Faded jeans, Dusty concord, Black Soot
Houses: Black soot, white gel pen

I stamped the sentiment and cut it to fit the black mat that I die cut using a die from Gina Marie Designs. I die cut the moon and stars using dies also from Gina Marie Designs. I cut a black cardstock mat for the card front and adhered everything together. The card was finished! 


Thank you for visiting today and I hope you enjoyed this fun card! If you are interested in this stamp set, here's the link: Practically Perfect


Sunday, March 21, 2021

Paper Nest Dolls: Bunny Kisses & Easter Wishes

Easter will be here in two weeks! There's still time to make a quick and cute card to send to your family and friends using this digital stamp from Paper Nest Dolls called Bunny Wagon. Add your own sentiment and you have the perfect Easter card. Change the sentiment and you can use this stamp for birthday, happy spring, thank you and friendship cards. 


I colored the stamp using Copic markers then use a couple of Prismacolor pencils to add some fur texture to the bunny ears.


Copic markers & Prismacolor pencils used:
Hair: E59, E57, E55, E50
Skin: R56, E11, E21, E00, E000
Pink: G40, RV52, R81, RV00; Prismacolors: PC928, PC929
Green: G82, G40, YG11
Gray Bunnies: W3, W1, W0, W00
Gray Wagon: T7, T5, T3, T1, T0
Brown Wagon: E35, E33, E31
Ground: C3, C1


After coloring, I trimmed the paper to fit an A2 size card. I added a pink cardstock mat under the card front. I created the sentiment using MS-Word, printed it and trimmed it to size and added the matching pink cardstock mat. 


This card is easy to make and great for those last-minute Easter cards to send! 
Thank you for stopping by and have a creative week!

Saturday, March 20, 2021

Conie Fong Art & Design: 4th Anniversary 40% off Sale & Freebie

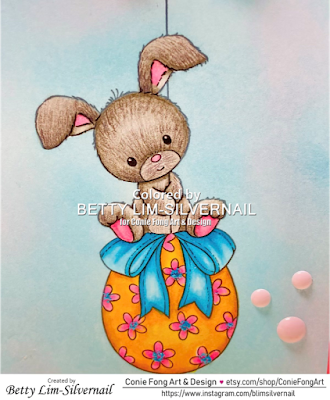
Happy Spring! We are celebrating Conie Fong Art and Design's 4th Anniversary sale with a whopping 40% off everything in the store until March 31, 2021! We are also giving away an adorable digital freebie just in time for Easter over in the Kit and Clowder Facebook Group! I've colored up this cute digital stamp and made this card for a friend.


Since it's a digital stamp,you can make it any size you like. I made this big enough to put on an A6 size card (4-1/2" x 6-1/4"). I colored this stamp with Copic markers. I used patterned paper from Stamp Anniething and the stamp-shaped die is from Gina Marie Designs. I created the sentiment in MS-Word.


Copic Markers Used:
Bunny (Gray): W4, W3, W1, W0, W00
Bunny feet, ears, nose, cheeks: R20, R30, R00
Aqua: BG05, BG02, BG01, BG00
Purple: V17, V15, V12
Green: YG17, YG13, YG11
Grass: G05, G02, G00
Blue shadow: BG000


This is a fun stamp to color! Great one for your kids to color too! Thank you for visiting and have a creative week!


Friday, March 19, 2021

Blank Page Muse Art Rubber Stamps: Bright and Beautiful Flower Fairy Card

I love fairy tales that are enchanting and stories of magic and fairies. This is why I love stamps that are cute and whimsical. When I saw this stamp set called Fairytale Fantasy Figures designed by Terri Sproul from Blank Page Muse Art Rubber Stamps, I knew I had to make some projects with it. I decided to make a bright and beautiful card as my first project with these stamps. 

This stamp set comes with six amazing flower fairies, one flower image and eight word stamps that can be used alone or combined to make different sentiments. This is the perfect stamp set to use for this month's challenge optional twist, "flowers."


Supplies:
  • Blank Page Muse Stamp: Fairytale Fantasy Figures designed by Terri Sproul
  • Card base:  White cardstock cut to 3-5/8"W x 9-3/4"H and score at 4-7/8" and fold for a top folding card
  • White cardstock - mat #1 cut using an A2 rectangular scalloped die
  • Green cardstock - mat #2: 4-1/8" x 5-3/8"
  • Orange cardstock - mat #3: 3-7/8" x 5-1/8"
  • White cardstock - card front to stamp flowers: 4.5" x 5.25"
  • White cardstock - 3" x 3" to stamp flower girl
  • White cardstock - 2" x 2" to stamp sentiment
  • Black ink pad
  • Stamping block or platform
  • Favorite coloring medium (I used Copic markers - colors listed below)
  • Scissors
  • Scrap bond paper to make hill stencil
  • Distress Oxide ink - Evergreen bough
  • Blending brush
  • Molotow masking liquid
  • Circle punch - 1" or bigger, depending on your sentiment
  • Favorite adhesive
  • Foam squares/dots
  • Optional: Sparkle/glitter pen
Copic Markers Used:
  • Skin: E11, E21, E00, E000
  • Green: YG97, YG63, YG03
  • Orange: YR18, YR16, YR15, YR14, YR20
  • Yellow: Y38, Y17, Y15, Y11
  • Blue: BG05, BG02, BF01, BG00
  • Sky: BG000, BV000
Instructions:
  • Stamp the flower girl onto the 3" x 3" white cardstock and color the stamp using your favorite coloring medium.
  • Using the white cardstock/card front, stamp the the first flower image in the left top corner of the cardstock. Use the Molotow masking pen to mask the stems and leaves where the second flower stamp will overlap. Stamp the second flower.
  • Color both flowers. Later the second flower will be trimmed so that only 3/4 of the flower will be showing.
  • Using scrap bond paper, drawn a hill shape that is no more than 1-1/2 inches on the right and left sides. Have the hill dip in middle. Cut with scissors.
  • Place the hill mask over the card front and use a blending brush and Oxide Ink in Evergreen Bough to ink in the grass hill. 
  • Using your favorite coloring medium, color in the sky.
  • Now add in flicks of grass to the hill.
  • Trim the card front to 3-1/4" x 4-5/8". Cut off part of the flower that is on the right side of the card.
  • Adhere the flower girl onto the card front using foam squares or dots. Layer the cardstock and adhere onto the card base. Add some sparkle with a glitter pen.
  • Stamp the sentiment on the 2" x 2" white cardstock. Punch out the sentiment using a 1" circle punch (or bigger if using a bigger sentiment). Using an orange marker, ink the edges of the sentiment.

Your card is finished! I hope you give this card a try. There are lots of flower girl stamps to choose from in the set. 


Thank you for stopping by and have a creative day! 


Wednesday, March 17, 2021

Conie Fong: Happy Easter Card (Clean and Simple/CAS)

Easter is one of my favorite holidays. When I was a child, my family always colored Easter eggs and we always got a basket full of candy. When my kids were little, we did the same thing. We made more eggs than we can possibly eat!

This past weekend, I shared a card with Conie Fong's Easter Bunny Trio Bundle with all three bunnies on the card. This digital stamp set also comes with the bunnies separately. In order to make a few quick cards to send to friends, I decided to make mini-slimline cards with just one bunny and an Easter greeting. A real clean and simple (CAS) card! 


I first printed the digital bunny stamp and sentiment on white cardstock and trimmed it to 3"W x 4-5/8"H. I then printed the bunny stamp again on masking paper so that I can mask it off to ink the background.  After applying the mask onto the bunny image, I used a Distress Oxide ink in Tumbled Glass and Spun Sugar to create the background to look like the sky. I then took the mask off and colored the stamp with Copic markers. I used Prismacolor pencils to add fur texture to the bunny. 


Copic markers & Prismacolor pencils used:
Fur: W6, W4, W2, W1 and Prismacolor PC1065, PC0163, PC1060
Pink: R83, R81, RV02, RV00
Aqua: BG05, BG02, B00, BG000
Yellow: YR23, Y17, Y15

Next, I cut the white card base at 6-1/2"W x 6" H and scored it at 3-1/4" and folded it in half. Then I cut the pink mat at 3-1/8"W x 5-3/4"H and adhered it to the card base. Then I adhered the card front to the pink mat. 

I used a bow die from Gina Marie Designs to cut out a bow from a scrap piece of patterned paper and added some enamel dots I had in my stash. The card was done in no time! 


Thank you for visiting and I hope you have a very creative week! 


Monday, March 15, 2021

Stamp Anniething: You Are "Reely" Awesome

I have some really great childhood memories fishing with my grandparents and uncles on the banks of the Sacramento River. It wasn't the fishing part I enjoyed, I just liked being with my grandparents and uncles since we only got to see them in the summer as we lived in different towns. This Stamp Anniething stamp called, Stephen- You Are Really Awesome, brings back all these good fishing memories so I wanted to make a cute slimline card. This card is perfect for several occasions, including birthday, thank-you, friendship, etc. 


I first cut out all the cardstock needed to make this slimline card. 
  • White cardstock base: 6-1/2"W x 7-3/4"H; scored at 3-1/4"; fold in half
  • White cardstock card front: 3-1/4"W x 7-3/4"H
  • White cardstock to stamp your stamp and sentiment 5-1/2"W x 4-1/4"H
  • Blue cardstock for slimline frame: 3-1/2"W x 8"H
Next I stamped this stamp on white cardstock then scanned it into my Silhouette Studio software so that I could print and cut it on my Cameo. Then I colored it with Copic markers (colors listed below). 

I used hybrid inks (colors listed below) and several of the new stencil builders to create the background scene: 1) Ocean Stencil Builder; 2) Mountain Stencil Builder; and the 3) Cloud Stencil Builder. I started at the bottom with the Ocean stencil. I added layers of ink until I found the right shade I liked. I used blue prismacolor pencils (PC395, PC393, PC391) to add some shading under the boat then used a white gel pen and blue Copic markers to add some bubbles to the water. 


Copic markers used:
Skin: E15, E13, E11, E21, E00
Cheeks: R21, R20
Tongue: RV14, RV11
Hair: E18, E08, YR18, YR14
Green: YG97, YG95, YG93
Brown (clothes): E77, E74, E71
Brown (boat & fishing pole): E49, E37, E35, E34
Reel: T3, T2
Fish: T5, T3, T2, T0
Blue dots/bubbles: B01, B00, B000

Stamp Anniething Hybrid inks used:
Ocean: Sky, Celestial, Amethyst, Obsidian
Mountains: Celestial, Lavender Bloom, Caribbean Sea
Clouds: Clear Sky, Caribbean Sea, Lavender Bloom

To finish the card, I adhered the card front onto the card base, the slimline frame, and the Kevin stamp all with liquid glue. I cut out the sentiment with a paper trimmer and rounded the corners with a punch. I used the sky hybrid ink to ink the edges then adhered it to the card with foam squares. The card is finished! 


Thank you for visiting and I hope you give this card a try. It is so fun and easy using the builder stencils. Have a creative week!


Saturday, March 13, 2021

Conie Fong Art & Design New Release: Easter Bunny Trio

Easter is just three weeks away so it's time to get those cards made for your family and friends. It's going to officially be Spring next week so let's all get in the mood for some bright and beautiful colors! I used Conie Fong's new stamp release called Easter Bunny Trio with Branch from the Easter Bunny Trio Bundle for my Easter card. This adorable stamp comes in a bundle with six images and two Easter sentiments. For this card, I came up with my own sentiment. These digital stamps are great for cards, scrapbooking, treat bags, and other Easter decorations!

Don't forget to enter into our monthly Facebook challenges to win some free digital stamps or a guest design spot! Head on over to the Conie Fong Art & Design fan page to check it out.


I printed this stamp 4-1/2"W x 3-1/2"H on Hammermill 80 pound white cardstock and colored it with Copic markers (colors listed below). 


Copic markers used:
Brown: E35, E34, E33, E31
Pink (Bunny ears and nose): RV02, RV00
Green: G07, YG06, YG03
Pink: B32, R85, R83, R01, RV00
Yellow: YR23, Y17
Purple: BV04, VB02, VB01
Blue: BG05, BG02, BG01
Outline/shadow: B000


I cut all the solid cardstock and patterned papers to fit an A6 size card. The patterned papers are from Stamp Anniething. 


Thank you for stopping by and hope you have a wonderful Easter! Have a crafty day!


Thursday, March 11, 2021

Stamp Anniething Craft with Betty: Have a "tea"-rific day!

It's been about a year since our favorite theme park, Disneyland, closed due to the COVID pandemic. However, they are getting ready to partially open up soon in hopes of fully opening sometime this year. In the meantime, I am having fun playing with all the goodies from Stamp Anniething's Magical Celebrations Grab and Go Box! 


A Grab and Go Box comes with all the things you need to make cards. This kit can also be used for scrapbooking, journaling, treat boxes, etc. It comes with stamps, dies, patterned paper, stencils, cardstock with envelopes, glue, double-sided adhesive, ribbon, shaker bits, and enamel dots! All you need are scissors, a paper trimmer, a die cut machine, and your favorite coloring medium.

Today I am sharing a slimline card I made using the Kevin-Tea Cup stamp and it's coordinating outline die, one of the sentiments, the magical headband (mouse ears) die, the fireworks stencil, and enamel dits. I also used a couple of other products available in the store; the Slim Line Basic Frame die and one of the Banner dies.

I first cut all the cardstock needed for this card:
  • Slimline card base: 6-1/2"W x 7-3/4"H, scored at 3-1/4" and fold in half.
  • Black cardstock mat: 3-1/4"W x 7-3/4"H
  • Black cardstock for the magical headband: 3"W x 1-1/4"
  • Red cardstock using Slim Line Basic Frame die: 3-1/2"W x 8"H. Use die to cut the frame
  • White cardstock (Hammermill 100 lb) for stamp and sentiment: 4"W x 6"H
I stamped Kevin-Teacup and the sentiment on white cardstock and cut it out using the coordinated outline die and banner die. Then I colored Kevin-Teacup using Copic markers, a Prismacolor pencil for the red shadows, and white gel pen for highlights.


Copic markers used for Kevin-Teacup:
Skin: RV42, E11, E21, E00, E000
Cheeks: R21, R20
Tongue: RV14, RV11
Hair: E59, E25, E33, E31
White: T5, T3, T2, T0
Blue: B06, B04, B02, B01
Red: R24, R32 & Prismacolor PC925

Next, I placed the fireworks stencil over the black cardstock and adhered to it my work surface. Using the white Prismacolor pencil, I put down a base coat, then used the colored pencils on top. Choose your favorite colors! Prismacolor pencils I used for the fireworks are PC938, PC916, PC1027, PC995, and PC924.

I die cut the magic headband, highlighted it with a white gel pen, then adhered it to Kevin's head. I adhered the black cardstock with the fireworks onto the card base; then the red frame. Next I added the sentiment using foam squares, then added Kevin-Teacup, also using foam squares. Lastly, I added a few different colored enamel dots and the card was completed. 


A video is available on YouTube on how I made this card. Check it out! 

Thank you for visiting today! This Magical Celebrations Grab and Go Box is so much fun! I will be making many more cards to share in the future. Have a creative week!


Sunday, March 7, 2021

Paper Nest Dolls New Release: A True Friend is an Angel in Disguise

We all have that one friend who is always there to help you and others. One that has the kindest heart. This is the true friend that is an angel in human form; the angel in disguise! This card is created with the adorable angel stamp (new release) from Paper Nest Dolls called Angel Ellie on Cloud and it comes in red rubber and in digital. I made this card as a friendship/thank you card; however, this stamp is also perfect for birthday, get well, sympathy, and note cards, scrapbooks, party favors, and other paper projects.


I used the digital stamp, so I first printed and colored the stamp with Copic markers (colors listed below). I then die cut the stamp using a stitched oval die from Gina Marie Designs. I then cut an oval lace die from Gina Marie Designs and layered the stitched oval die over it.


Copic Markers Used:
Hair: E57, E35, E33, E53, E50
Skin: RV42, E11, E21, E00, E000
Cheeks: R20
Clothes & Wings: B32, R85, R83, R01
Cloud: BV23, C3, C1, C00

I cut an A6 card base from white cardstock, a mat from pink cardstock, and patterned paper from Stamp Anniething for the card front. I created a sentiment using MS-Word, printed it, then trimmed it to size. I added the matching pink cardstock as a mat behind the sentiment. Everything is glued flat except for the sentiment, where I used foam squares. I added a few sparkle stars and dot with a white gel pen. The card is finished! 


This is a easy and fun card to make. I hope you give it a try! Thank you for visiting and have a crafty day! 

Saturday, March 6, 2021

Stamp Anniething: Happy St. Patrick's Day Card

I just love my Stamp Anniething chibi doll! This digital stamp is called Betty - Good Luck and she debuted last month during my Craft with Betty video for Chinese New Year. Now she's back celebrating St. Patrick's Day. A versatile stamp that can be used for any holiday and occasion! 


I printed out this stamp on Hammermill 80lb cardstock then colored it with Spectrum Noir Illustrator markers (colors listed below). I created the Happy St. Patricks Day using MS-Word, printed it, then used the banner dies to cut it out. 


Spectrum Noir Illustrators used:
Skin: AP3, FS8, FS7 FS6, FS9
Cheeks: FS4, FS1
Tongue: PP4, PP1
Hair: True Black, IG9, IG6, IG2
Green: DG3, LG4, LG2, LG1
Blue (Glasses): IB1

For this A2 size card, I used the nested stitched oval dies from Gina Marie Designs to cut out the stamp. I used patterned papers from Luck of the Irish paper pack to mat the oval and the card front. I adhered everything as shown and added a few enamel dots from my stash.


St. Patrick's Day is March 17, 2021, so there's plenty of time to make a few cards to send to your family and friends. Thank you for visiting and have a crafty weekend! 


Friday, March 5, 2021

Stamp Anniething New Release (Day 3): Liang - Checkmate

Welcome to Day 3 and the final day of Stamp Anniething's new release. Today's card features the cute stamp called Liang - Checkmate, coordinating outline die, and part of the Game Spinner Add On Builder Die. Isn't Liang a cutie? He is Stamp Anniething's first Asian boy chibi stamp! 


I first stamped the image then cut him out using the coordinating die. I colored this stamp using a Copic markers (colors listed below).


Copic Markers used:

Hair: T9, T7, T5, T1
Skin: RV34, E13, E02, E01, E00
Cheeks: R21, R20
Tongue: RV14, RV11
Red: R59, R37, R24, R32
Blue: BG06, BG05, BG02, BG01
Yellow: Y17, Y13, Y11
Brown: E49, E47, E44, E42

To make this card, I first used a 1-1/4" square punch to cut 6 squares out of black cardstock to make the checker board background. Then I used the circle and circle frame from Shaker Basics Set #1 to cut the spinner base. I used the Chess stencil and distress ink to create the spinner background. I used the arrow and center circle from the Game Spinner Die and cut them out using black cardstock. I used a brad to fasten the two pieced together and added it onto the game spinner with a glue dot.


I cut out the word fun (and the outline die) twice and added it to the game spinner. I stamped the sentiment and used a banner die to cut it out. I cut two fish tales from the same banner die. I added Liang to the card using foam squares. Lastly, I added a few enamel dots from my stash.

I hope you enjoyed this month new releases of fun and cute stamps, dies, and a stencil. I sure had fun creating these cards!  

Thank you for visiting and have a creative week! 

Thursday, March 4, 2021

Stamp Anniething New Release (Day 2): Kelly - Take a Chance

Welcome to Day 2 of the March new releases! Today's card features Kelly - Take a Chance stamp, coordinating outline die, and the Game Spinner Add On Builder Die. This is such a fun die to play with! I made the shaker so that each slot has different shaker bits. The spinner actually works too! 

This stamp and die set is great for kids and adult (gambling & gaming friends!) birthday, friendship and sweetheart cards and paper projects. 

Note: Links will be provided on Friday, March 5, when the products are released in the store.


I first stamped the image then cut her out using the coordinating die. I colored this stamp using a combination of Spectrum Noir Tri-Blends and Illustrators (colors listed below).


Spectrum Noir and Tri-Blends used:

Hair: LV3, HB2, PP1
Skin: RB2, FS8, FS7, FS6, FS9
Cheeks: FS4
Tongue: PP4, PP1
Green (Tri-Blend): GT3, GT2, GT1
Gray: IG6, BG6, BG4, BG2
Dice: Gray - BGR3, BGR1, Blender
Dice: Black - True Black, IG9, IG6, IG2

For this A6 size card, I first made the shaker using the circle shaped die from Stamp Anniething's Shaker Basics Set #1 and the Game Spinner Add On. From the pie-shaped pieces that come from the die, I colored them using different colors for the background and adhered them to the backing of the shaker.  I used the circle shaped die to cut a hole in the craft foam to insert the shaker so that it lays flush on the card front. All the shaker bits I used are from Stamp Anniething. I used the newly release "Summer Tropics" patterned paper that will be available in the store on Friday. 


I stamped the sentiment and used one of the banner dies to cut it out and adhered it to the card. I added a few enamel dots and the card was finished. 


I hope you give this fun card a try! Come back tomorrow for Day 3 of the new releases. I will share another fun card. Have a great and creative day!