
Project 1: Princess Pin Up Girls - Who Needs a Glass Slipper? I'd Rather Have a Glass of Wine!

Scrappy Boy Stamps products used:
- Princess Pin Up Girls stamps, outline die, and paper pack
- High Heels Background Stencil
- Corset Mini Album die
- Stitched Scalloped Edge Dies
Supplies used:
- A2 white card base
- White cardstock
- Distress Inks in Broken China and Blueprint Sketch for stencil
- White gel pen

Copic markers used for coloring stamps:
- Skin: E04, E11, E21, E00, E000
- Cheeks: E93
- Lips: R35, R32
- Hair: E99, E55, E3, YR31
- Dark Blue: B18, B16, B14, B12
- Light Blue: B02, B01, B000
To create the Corset, I first inked white cardstock with Distress Ink in Broken China. Then I used the High Heels Background Stencil and inked it in Blueprint Sketch. I used the Corset Die to cut out all the pieces and assembled as shown.
I stamped the sentiment on the inside of the card before I started the front of the card.

I used the Stitched Scalloped Edge Die to cut out the pink patterned mat. The blue patterned strip measures 3-1/2"W x 2-1/4" H and is backed by white cardstock with a 1/8" border on the top and bottom.

I adhered all the pieces using liquid glue, except for the princess, where I used double-sided foam tape.
Project 2: Three Little Pigs - Congratulations On Your New Home!

Scrappy Boy Stamps products used:
- Three Little Pigs Stamps, Outline Dies, Paper Pack
- Three Little Pigs House Stamp & Outline Die
- Three Little Pigs House Decorator Stencils
Supplies used:
- A6 white card base
- Distress Oxide in Tumbled Glass
- Distress Inks in Pumice Stone, Ripe Persimmon, Fired Brick (house)
- Distress Inks in Vintage Photo, Lucky Clover (tree)
- Kraft cardstock
- White cardstock
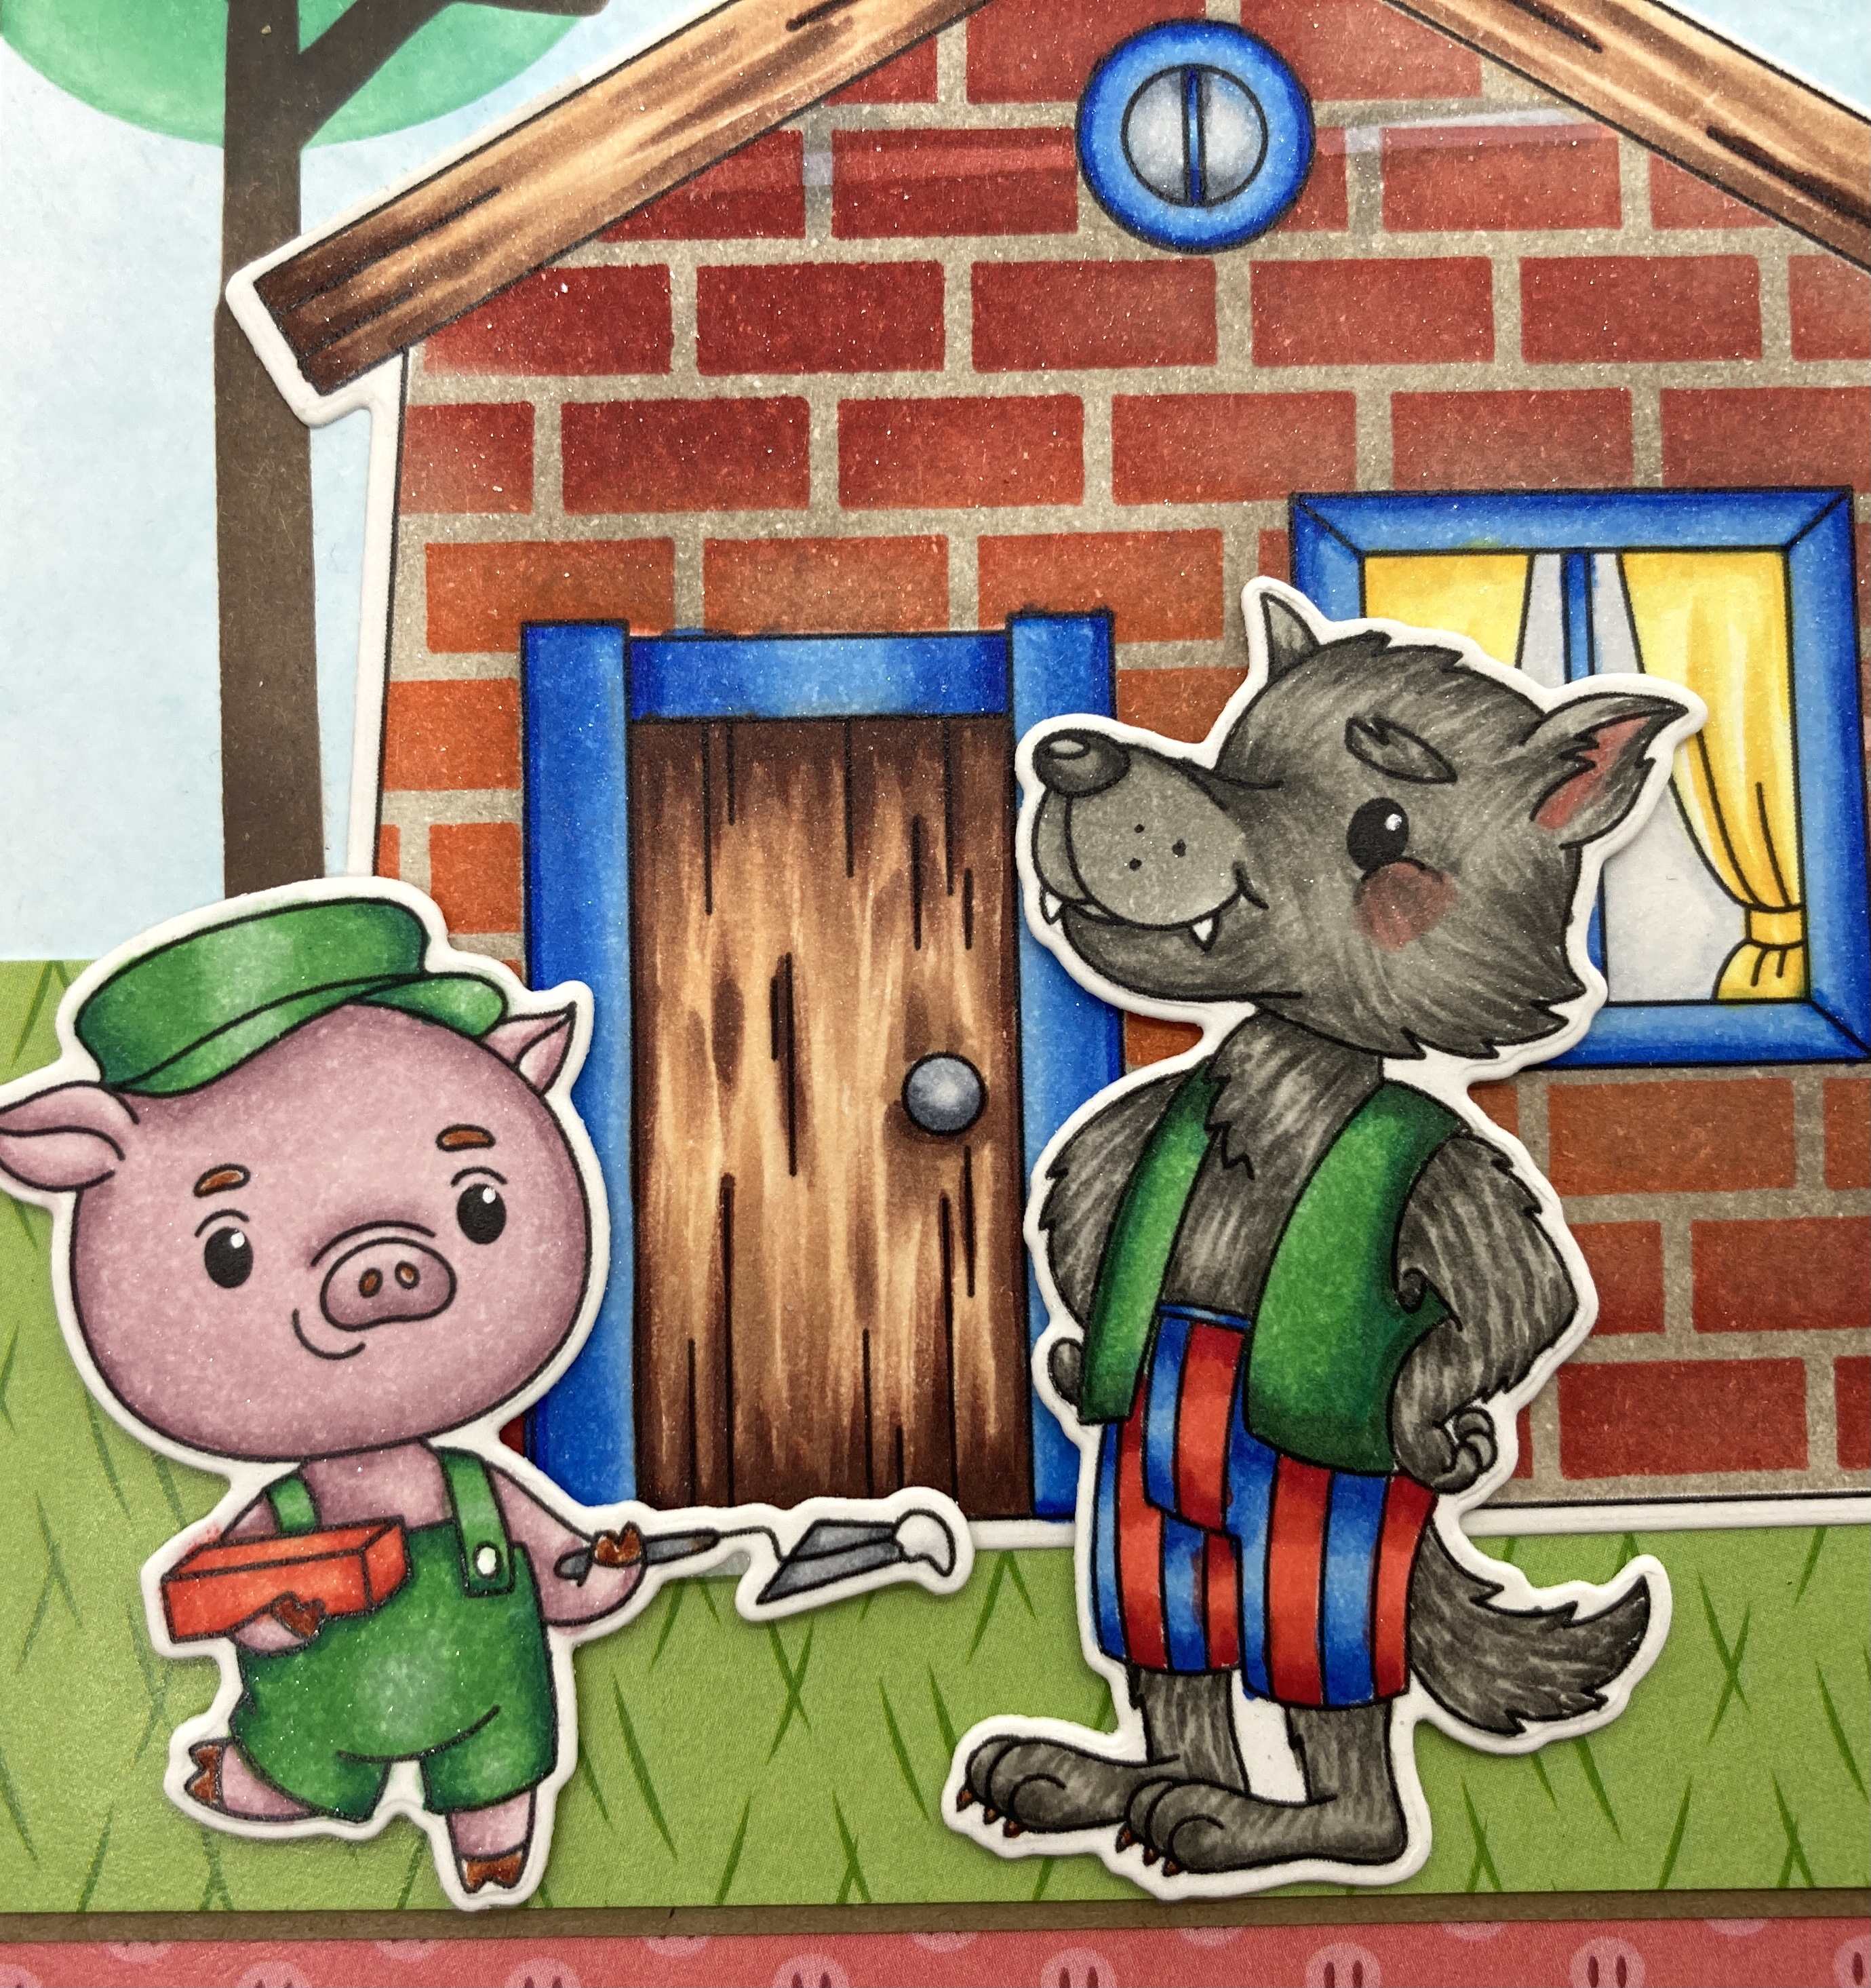
Copic markers used to color stamps:
Pig
- Skin: RV95, RV93, RV91
- Brown: E15
- Green: G17, G14, G12
- Red: R17, R14, R12
- Silver: N5, N3, N1
Wolf
- Fur: W7, W6, W5, W3, W1
- Blue: B26, B24, B21
- Green: G28, G17, G14, G12
- Red: R29, R24, R22
- Pink: R21
- Brown: E15
House
- Blue: B28, B24, B21
- Brown: E29, E25, E23, E21
- Dark Gray: C1, C00
- Yellow: Y19, Y15, Y13, Y11
- Light Gray (window): C1, C00
I created the background using Distress Ink in Tumbled Glass. I used the Three Little Pigs House Decorator to create the tree using the inks listed above in the supply list. I then stamped the sentiment.
For the house, I first stenciled the wall with the Three Little Pigs House Decorator stencils before coloring them with Copic markers (Distress Ink colors in the supply list above). I cut the green patterned paper for the grass and adhered it to the card front. I matted this with Kraft cardstock with a 1/8" border and placed it on top of more patterned paper before adhering it to the card base.
I adhered the house onto the card front using liquid glue and for the pig and wolf, I used double-sided foam tape.

Such fun and cute cards to make! I hope you give them a try! Thank you for visiting. Have a crafty day!


